Friday, September 14, 2012

Thalia Learns to Cook: Sweet Potato Fries!!

Recipes and examples of dishes I can now make!  Taken from a variety of sources and changed according to my abilities, needs, and dislike of doing dishes.


I have discovered the secret!  After years of trial and error, late night attempts and multiple multiple multiple recipe searches online, I have figured it out.

What? You may ask?

A deeply important, all encompassing, really critical piece of information.

How to avoid totally soggy sweet potato fries.

What? You were expecting the Higgs Boson?

Ok, so I love sweet potatoes. They are delicious. And, better for you than white potatoes, not to mention more flavorful.  Although they are tasty heated up in the microwave, I love making sweet potato fries. And as a bonus, a sweet potato fry is an excellent food to feed a baby. Which I have.

The problem is, most of the time I end up with soggy fries.  I wash the sweet potatoes, toss them with some olive oil and spices, and then put them on a baking sheet in the oven or toaster oven. And they come out soggy. Delicious, but without a nice crisp skin.

Happily, I came across the solution by accident the other night.

As mentioned, I have a baby.  He's 6 months old and therefore starting to eat solid foods.  One tip I've  been given is to use a crinkle cutter to cut up his food.

Crinkle cutter!!
It creates lovely little ridges, making it much easier for his small fingers to pick up something slippery. It works great, so when making him some sweet potato the other night, I crinkle cut up the potato, spiced it, and tossed it in the toaster over.

Surprise! Totally delicious sweet potato fries with a nice crisp skin! I almost didn't give any to the baby.

Recipe: Sweet potato fries with a crisp skin!

Ingredients:

Sweet potatoes
Olive Oil
Spices

Tools:

Crinkle cutter
Knife
Oil brush
Ramekin
Baking sheet

Method:

1) Cut the sweet potato long ways in half.
2) Use crinkle cutter to cut each half into 1/3rds, or whatever thickness your sweet potato loving heart desires.
3) Mix together olive oil and spices. I sometimes use rosemary and garlic. Curry also works really well. Or oregano and thyme. In the end, you get very subtle flavors, so go crazy!
4) Places fries on baking sheet. Make sure they're not touching each other.
5) Brush the fries with the oil and spice mix. Make sure to get all sides.

Brush with oil and spices
6) Put in the toaster oven, 400 degrees, 5 minutes and then flip the fries and 5 minutes more.
I love a good toaster oven.


Eat, making sure you get some on your bib, hair, ears, lap, high chair, floor and under your knee. (I have no idea how it got there).


yup.


Enjoy!

Thursday, August 23, 2012

The Two Best Cream Cheese Frostings EVER: Dulce de Leche and Whipped Cream

Today was not my best day -- my laptop died (RIP Antonio!) just as I was about to make a brilliant scientific discovery (that's what we're calling null effects these days) and shortly thereafter I nearly followed its example on a short 3 mile run (damnit legs! I thought we had a truce!). So, instead of actually addressing any of these issues (anyone wanna buy me a new laptop? Or some bionic legs?) I baked.

I had a vision, but not much more to go on than that -- chocolate cake with dulce de leche frosting.

This post isn't about the cake (my new staple), but about the magical frostings that just kind of inexplicably happened-- dulce de leche cream cheese frosting (important fact: my ipad changes "dulce" to "bruce", so this frosting will from now on be called "bruce") and, perhaps even better, whipped cream cream cheese frosting. Two creams in one. YES.

Unfortunately, but totally consistent with the theme of the day, while the dulce de leche frosting was delicious and provided a nice crumb coat, there wasn't enough of it, nor was it quite stable enough for decorating. So I reached into the vault of frosting recipes I have on hand (hello, google) and found a whipped cream cream cheese frosting.

This is my new favorite thing. I don't know if I can adequately describe my love of this frosting in my current fragile state, so let me just say -- it's amazingly delicious, not too sweet, light and fluffy, and be still my buttercream detesting heart, decorates as well if not better than the comparatively tasteless butter monstrosity (speaking of, I have 5 pounds of butter in my fridge. Ideas? Suggestions? Requests?).

Things seemed to finally be going my way -- my day took a definite turn for the better when I tasted these delicious frostings! I frosted and decorated my cake, reveled in the beauty of it, tasted the delicious frostings, reached for the lid to my cake carrier, and... well... gravity is such an asshole. Note to self: Do not keep cake carrier on top of the kitchen cabinet.


I have high hopes for tomorrow.

Sorry about the lack of pictures -- I didn't realize these recipes would be post-worthy until it was too late. Instead here is a picture of penguin duct tape. I'm calling it Bruce. 

Dulce de leche frosting (or, Bruce): 

Ingredients: 
2 cans sweetened condensed milk
2 8-oz blocks of cream cheese

First, make the dulce de leche--don't be scared! It's incredibly easy and everyone will be wildly impressed. Pour the milk into the top of a double broiler and cook it for an hour or hour and a half, stirring occasionally and adding water to the bottom of the double boiler as needed until the milk turns a light caramel color and thickens up. Let it cool.

Whip the cream cheese until light and fluffy. Add in the dulce de leche and whip!

Note: It might be a better consistency for decorating if I had used either 3 blocks of cream cheese or didn't use all the dulce de leche. I didn't try either, but if you do, let me know how it goes!

Whipped Cream Cream Cheese Frosting: 

Ingredients: 
1- 8oz block of cream cheese
1/2 c sugar
1 t vanilla
pinch of salt
2 c heavy cream

Whip the cream cheese, sugar, vanilla and salt until light and fluffy.

Add the cream and slowly mix to incorporate. Once it's combined, ramp up the speed and whip like mad until the frosting is nice and thick, about 2-3 minutes.

Sunday, August 19, 2012

Strawberry Charlotte Russe: An Oldie but a Goodie.

I'm so super lame. I haven't posted any recipes for a long time... and I've even been baking tons! Just as much as ever! I've had a recent love affair with blondies (see? I took pictures, I totally intended to write it up).
Chocolate Peanut Butter Blondies
I made another cheesecake in puerto rico (this time key lime, again without any supplies as you can see by the 9X13 dish we had to use, and under duress with a NOVA crew filming our efforts): 


And I even branched out into candy and made chocolate toffee salted caramels.

I don't have Thalia's excuse (no babies here!) but I have been traveling a lot this summer, and I had a big goofy handful of a foster dog that a few students and I rescued from Puerto Rico. Oh yeah, and I'm hitting the academic job market, but the less we can say about that the better (otherwise I might curl into a ball in the corner and never finish this post). 

Goofy foster dog, Toad.

Anyway, all of that preamble is to say, sorry. I'm super lame. BUT I have something super fabulous for your culinary enjoyment to make up for my super lameness-- Charlotte Russe! I was only introduced to Charlotte Russe a couple years ago when I was visiting my parents and we were getting ready for a dinner party. In brainstorming about dessert my mom suggested a Charlotte Russe, mentioning it as a childhood favorite and staple of her youth. 

For those of you, like the past me, who haven't heard of Charlotte Russe, it's basically custard encased in ladyfingers. That description doesn't really do it justice -- it's silky and sweet and understated. It's delicious. Also, it's gorgeous. Look at how pretty!! In other words, the perfect dessert for my comeback debut! 


Ingredients: 

For the ladyfingers: 
3/4 c. Kirsch 
3/4 c simple syrup (1 part water to 2 parts sugar, boil until sugar is dissolved, voila!) 
36-40 ladyfingers (the hard italian kind) 
parchment paper*
springform pan*
*If you don't have these, why not do it as a trifle! Instead of arranging the ladyfingers as described, alternate layers of ladyfingers and custard in a trifle dish)
Italian Style Ladyfingers
For the custard: 
3 c whole milk
1 1/4 c sugar 
4 t vanilla
1/2 t salt
1/4 c + 2 t blue curaçao or grand marnier 
1 packet unflavored gelatin 
1 packet strawberry gelatin (or you can use 2 unflavored or 2 strawberry, just decrease the sugar by a couple tablespoons if you use both strawberry)
10 egg yolks, well mixed
1 lb fresh or frozen strawberries, hulled
2 c heavy cream

For the Strawberry glaze: 
1.5 lb strawberries, hulled 
1/3 c sugar
1/2 c water + 2 T water 
juice from one lemon
1 T cornstarch
1/2 packet of strawberry jello (optional) 

Mix together the kirsch and simple syrup in a shallow bowl. Cut a piece of 30" parchment paper, fold it in half, and make a collar around the springform pan. Use a paperclip or a safety pin or something to fasten it together. 

Dip the ladyfingers in the kirsch/simple syrup mixture and hold for a couple seconds so they soak up the goodness. 

Place the ladyfingers (sugar side down) along the bottom of the pan, leaving enough space for perpendicular lady fingers to be placed around the rim (sugar side out). 

And keep going until the bottom is covered and there are ladyfingers all around the circumference. If you've adequately soaked the ladyfingers they'll expand and there should be no gaps. If there are gaps in the bottom fill them in with broken ladyfinger pieces. 

Now make the custard! Pour the curaçao into a bowl and sprinkle with the galatin powder. Set this mixture aside while you cook the custard. 

Bring the milk, sugar, vanilla, and sugar to a simmer and cook, stirring occasionally, until the sugar is dissolved (5-8 minutes). 

Once this happens, turn off the heat and add about 1 cup of the hot milk mixture to your reserved eggs, stirring to mix well (this is called tempering eggs). 

Add the tempered eggs back to the custard mixture and stir well. 

Cook over low heat, stirring constantly, until the custard thickens a little. You'll know it's done when you turn your spoon over and run your finger through the custard on the back and the custard doesn't fill back in the mark you've made. 

Pour the custard through a strainer into a large bowl then add in the gelatin mixture, whisking until dissolved. 

Stick the custard in the refrigerator for about 15-20 minutes, stirring occasionally, until it reaches about room temperature. 

Meanwhile, puree the strawberries. 

When the custard is cooled, add the strawberry puree to it, mixing well. 

Whip the cream, and fold it into the custard. 


Pour your custard into your ladyfinger springform pan, and refrigerate for at least 4 hours. I took this opportunity to go to the beach, and highly recommend it. 

Next make the strawberry glaze! Bring the strawberries, water, and lemon on the stove on medium-high  up to boil then reduce the heat to low and simmer until the strawberries break down (about 10 minutes). You may need to encourage them to do so by smashing them with a potato masher. It's also loads of fun. 

Strain the solids from the sauce, pressing as much juice as you can out of them before discarding. 

Whisk the cornstarch with 3T water, add to your strawberry concoction (and add the optional jello powder now too), and simmer 3-5 minutes until it thickens into a glaze. 

Cool for 15-20 minutes then pour on top of the custard, being careful to cover the whole surface with the glaze. 

Cool overnight. 

When it's time to serve, unlock the springform pan and remove the rim and the parchment paper. 

Cut it in pieces like a pie and serve immediately, otherwise it'll get a bit unstable. If you want to display it before eating, just tie a ribbon around it so it'll stay standing! 

Enjoy! 

Sunday, August 5, 2012

Thalia Learns to Cook: Sauces!

Recipes and examples of dishes I can now make!  Taken from a variety of sources and changed according to my abilities, needs, and dislike of doing dishes.

To my mind, a major component that separates the meal made at home from the fancy schmancy made in a restaurant is the presence of a sauce.  Sauces are delicious. They add flavor, moisture and depth to otherwise plain ole’ pieces of chicken, fish, etc.  However, they are difficult to make and make well. Although I haven’t been doing much new cooking as of late (see: 5 month old who is cute and smiley and doesn’t think sleeping is something he should be doing), I have been starting to venture into the world of sauces. And also panko bread crumbs (which are amazing and the subject of another post).

Tonight, we decided to make a lemon caper chicken.  Or rather, chicken breasts with lemon-caper sauce. What is a caper? I have no idea. But it’s small and salty and goes well with lemon.  Plus, we had some delicious rose wine that had to be drunk. 
Delicious Rose wine.

Gone are the days where opening a bottle of wine means finishing it in the same night. Nope, we have become 1-glass with dinner people. Mostly because any more than that and I will fall face first, dead asleep, into my lemon-caper chicken. So, there was extra wine. On with the recipe!

 Ingredients (Recipe taken from http://allrecipes.com/recipe/chicken-with-lemon-caper-sauce/)
  • 1 pinch salt (I omitted this- the capers have so much salt in the sauce, no salt needed for the chicken).
  • 1/2 cup all-purpose flour (You actually need way less than this, just enough to coat the chicken).
  • 2 (6 ounce) skinless, boneless chicken breast halves (I cut these down to even out the cooking)
  •  2 tablespoons olive oil (I also added some onion into the pan with the oil, only because I had left over cut up onion from some guacamole I had made earlier. Hate to let some cut up onion go to waste. It’s like you cried for nothing).
  • 1/4 cup dry white wine (I used dry Rose. It was delicious).
  •  1/4 cup lemon juice (I used a mix of fresh lemon and jarred lemon juice. It ended up being a bit too lemony- so next time I will use less).
  • 1/4 cup cold unsalted butter, cut into pieces (I used pastured butter. Um, pastured butter is the best thing in the whole world. Find some, buy it, eat it, and be happy).
  • 2 tablespoons capers, drained (I didn't drain them- it made the sauce a bit salty, but it was a good thing).
  • 2 lemon wedges (As mentioned, the sauce ended up pretty lemon-y, so extra lemon was unnecessary. Your experience may vary). 


Directions
1.     Mix together salt and flour in a small dish or plastic bag, then coat chicken and shake off excess. Heat olive oil in a skillet over medium-high heat. Shake excess flour from chicken, then brown in hot oil until both sides are golden-brown, and the inside has turned white and firm, 3 to 4 minutes per side.

Chicken dredged in flour. The word dredged is funny. 
Traditionally, I have a problem just letting the darn chicken cook. Leave it alone! Let it cook!  So now I set a timer, 3 minutes and turn. 3 minutes and flip. 3 minutes and turn. 3 minutes and flip.  Then it's done.  I get impatient.  So, instead of futzing with the chicken as it cooked (Leave it alone!) I took a picture of the timer on my microwave. That's how I roll.
39 seconds to flip!


2.     Remove the chicken, and set aside. Pour white wine into the skillet, and allow to boil as you dissolve the cooked bits from the bottom of the pan. Add the lemon juice, and allow to come to a boil, cook for a few minutes until reduced by half.

The wine almost bubbled away! Nooooo!

My stovetop is hot, so this took no time at all.  Beware, you might want to remove the pan from the heat to avoid losing all of your wine and/or lemon juice. 

3.     Sprinkle the cubed butter into the boiling sauce. Swirl and shake the pan vigorously to dissolve the butter, thus thickening the sauce. The butter must never come to rest, or the sauce will separate and become oily. Once the butter has completely incorporated, remove from heat and stir in capers.

I was stirring so fast, you can't even see my hand! I'm speedy. 

So, this instruction had me totally freaked out, and is the reason sauces are something I've tried to avoid.  It seems so easy to just mess it all up if you're not moving quick enough.  But, if you prep ahead of time (an important lesson!!), then it goes relatively smoothly.  Happily, my sauce did not break. Or if it did, I didn't notice.  Whatever, this much butter? It was delicious. 


4.     To serve, pour lemon-caper sauce over the chicken, and serve with a wedge of lemon.

Delicious!

I served with a salad: greens, tomato, red pepper goat cheese. The sauce was also a nice salad dressing. 

So was it delicious? 


Yes it was!


Wednesday, May 9, 2012

Thalia Learns to Cook: The slow cooker!

I'm back!  With slow cooker disaster!

So, in case anyone reading this doesn't know me personally, I have a good reason for taking the extended food blogging break that I just took- I had a baby.  He's really cute. Therefore, for the last month or so of my pregnancy, and the almost 3 months since the birth, I haven't been doing much in the way of cooking. Happily, others cooked for me, so I didn't starve.

However!  Once more unto the breech my friends!  The baby is beginning to nap like a normal baby and not one of these "I don't like to sleep unless I'm on top of you and anyways 20 minutes two times a day is enough of a nap!  Let's party and by party I mean cry!".... babies.  Um. OK, so the point being I have started to cook again.

I had this grand plan to try more vegan cooking after the baby. Cause, you know, I would have so much time to search out and experiment with new ingredients and new methods and new recipes.  Ha.

Instead, I have started to embrace the idea of slow cookers. For the uninitiated, slow cookers are these lovely devices where you put a bunch of stuff in, turn it on for 6-8-10 hours, and then you come home to lovely smells and delicious dinner.  Sounds great, right?  I don't own one.  But I do own a rice cooker that has a slow cooker function.


OK, so I've made two meals that were delicious: Indian Spiced Lentils and Chicken Korma.  But you didn't come to this post to read about food I can actually make?  No. You came for the disaster. So here it is:

Slow Cooker Disaster: Mulligatawny.

Mulligatawny is apparently a soup that is supposed to be delicious and sweet/savory.  It was featured in the "Soup Nazi" Seinfeld episode?  I think?

This is what it is supposed to look like:


The recipe I have serves 6 and is written for a 6-quart slow cooker.  I have a 4-quart rice cooker.  So I figured I would halve the recipe.  Simple enough, right?  WRONG!

I halved the recipe, but not the cook time. I ended up with burnt brown mash of food. I added more stock and let it cook for a little more. I ended up with burnt brown mash of food.

It was this color:


Not appetizing.


But here's the weirdest part.  No one online can tell me what to do with cooking times when I halve recipes.  In fact, google seems to not have any results from anyone who has ever halved a slow cooker recipe before. Several results say "check your manual."

I would love to do that, but I got this thing as a gift 5 years and 4 moves ago.  I don't have the manual.  I'm surprised I still have the rice cooker.

If anyone has any tips, I would appreciate it. In the meantime, I will update this post if I ever figure out a way to recover from this disaster....

Mulligatawny.

The Ingredients:
2 boneless, skinless chicken thighs
1 cup peeled and chopped apple
1 cup chopped carrots
1 (15-oz) can of fire-roasted tomatoes
1 tablespoon dried minced onion flakes
1/4 cup raisins
1 teaspoon lemon juice
2 teaspoons curry powder
1/4 teaspoon ground nutmeg
3 cups chicken broth
1/3 cup long-grain white rice (add later)

The Directions:
Use a 6-quart slow cooker. Put thighs in bottom of cooker.  Add everything else on top. Cover and cook on low for 8-10 hours. Uncover and stir in the uncooked rice. Flip to high for 30 minutes, or until rice is tender. Shred chicken thighs with forks, ladle into soup bowls, enjoy.

Enjoy.

Unless, of course, after 8 hours you open up your rice/slow cooker to discover a brown mash of burnt food. Sigh.

Tuesday, April 24, 2012

How to host a Kentucky Derby Party (with footnotes)

It's that time of year again! Time for the best, the most ridiculous, the most strange, and importantly the most delicious party ever -- a Kentucky Derby party! For those of you1 who don't know what the Kentucky derby is, let me be your guide. You should totally trust me. I'm an expert2.

The Kentucky derby is an event at which people wear awesome hats, eat derby pie, drink mint juleps, and I guess some horses run around a track or something. But, let's be honest, it's really all about the hats and the food.
Hats of Shame. If you come to my party without a hat. Consider this fair warning.

I'm going to give you lots of details about how you, too, can host your own derby party3! But this time I'm afraid it will be details only on the food. You'll have to wait until next year, or whenever I have time again, to learn about the hats and the betting etc.

So. Let's start with the menu. Here's what I recommend.

Start with mint juleps4 and benedictine cheese5.
Julep fixins, benedictine cheese, and deviled eggs. Also a good addition.

For the main course, I serve hot browns, corn pudding, and dressed cucumbers6.
Hot browns. Hungry just looking at them.

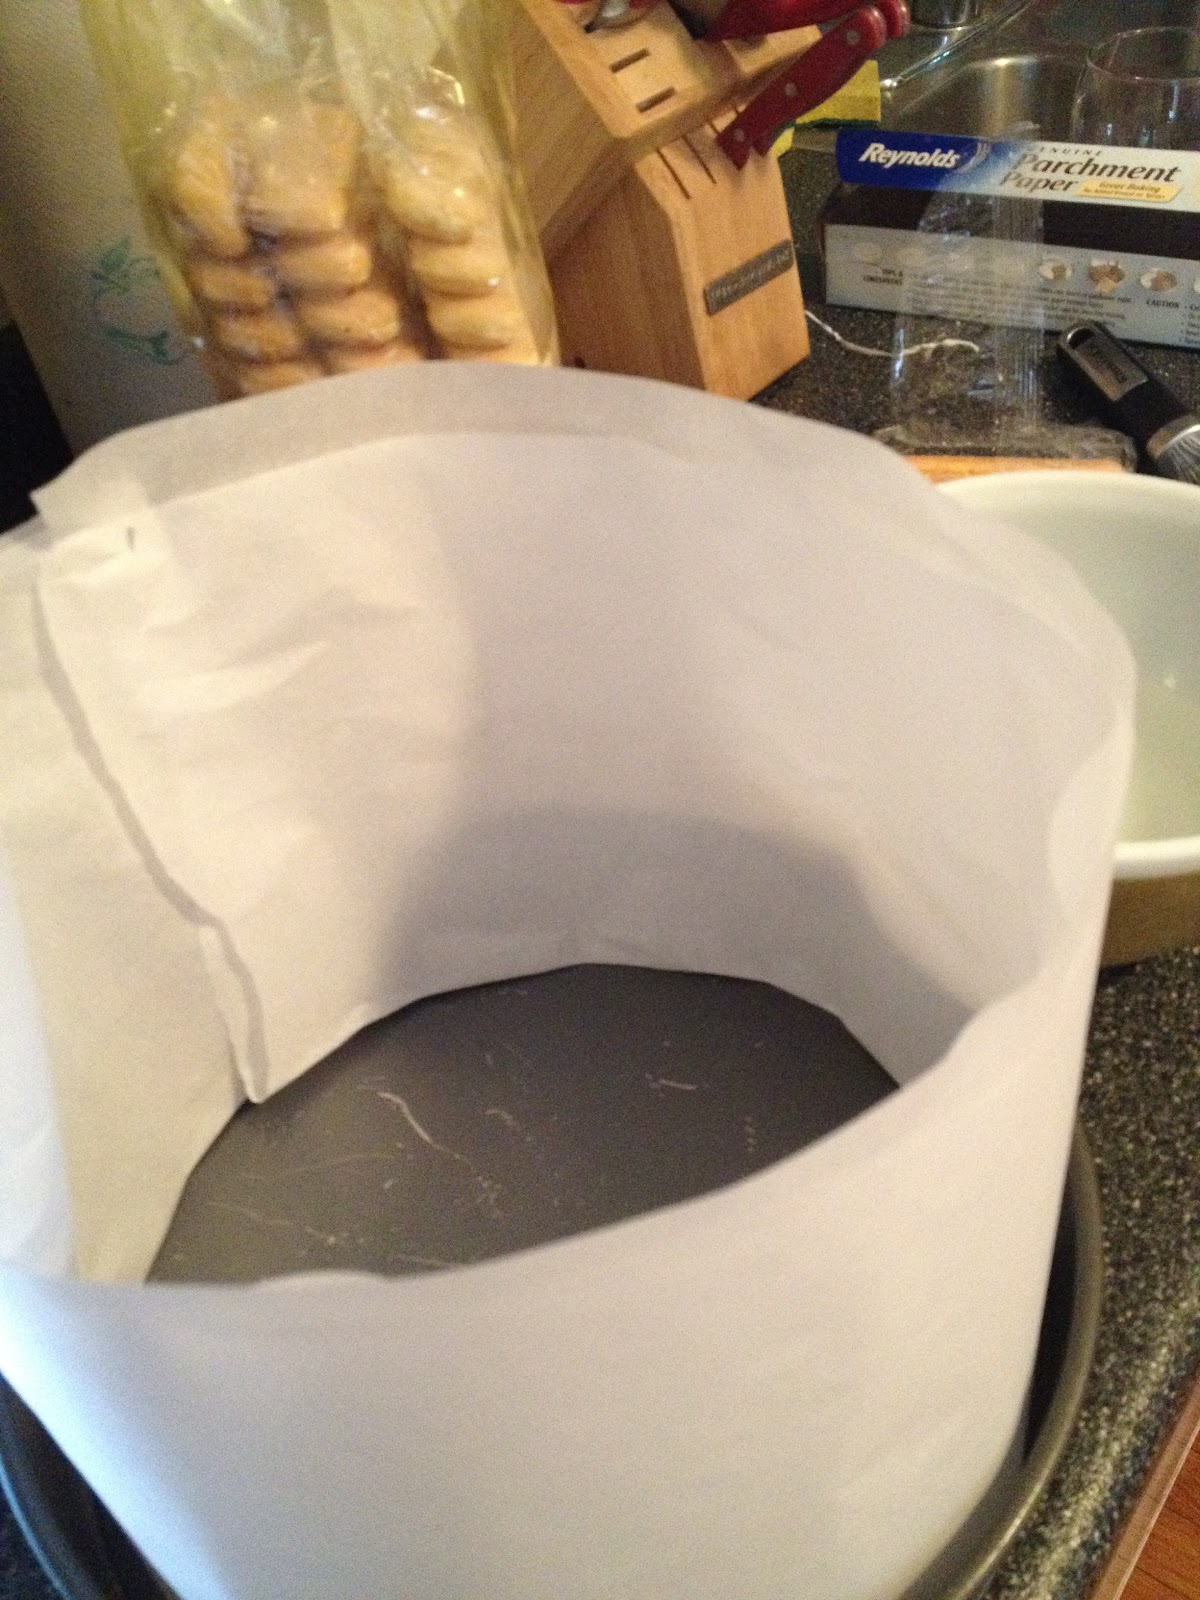
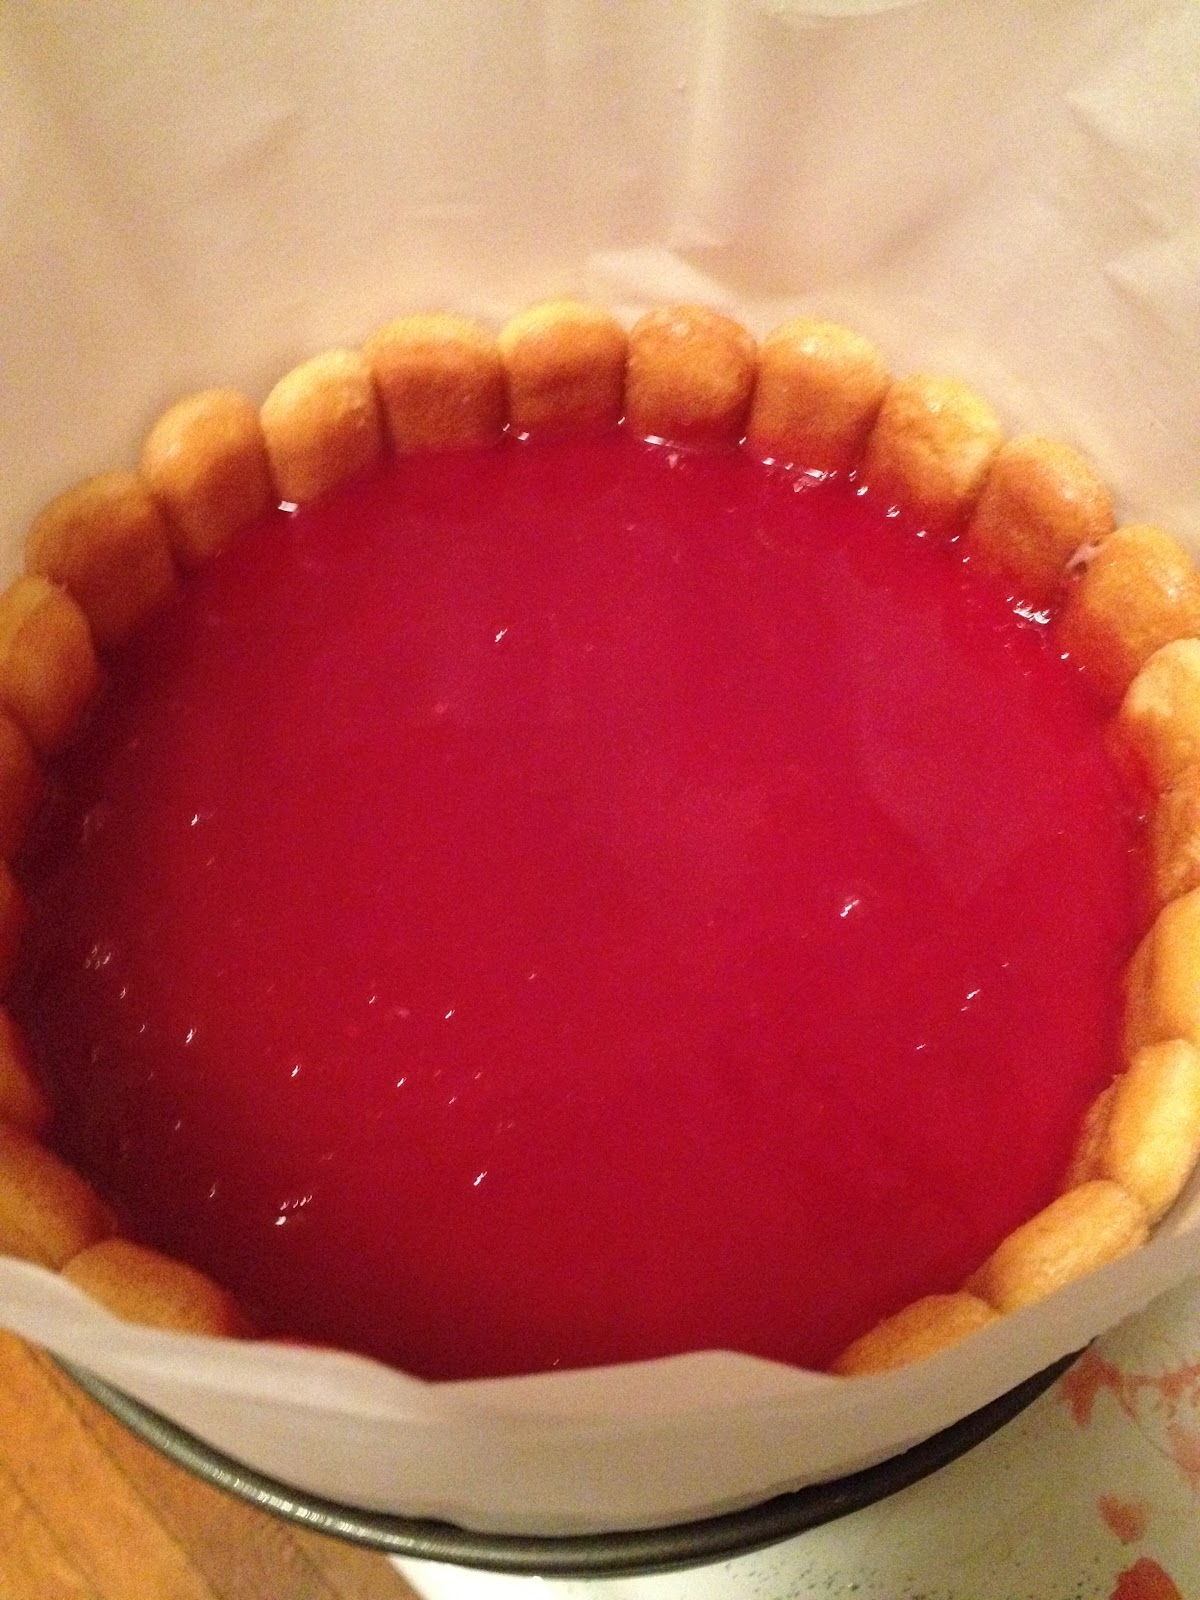
And for dessert I serve derby pies and bourbon balls7.
Derby pie in jars!!

Delicious! So, I'm going to give you recipes for all of these below (except the derby pie, which rightly deserves its own post). But, because I haven't actually done any cooking yet this year, the post will temporarily be pictureless. Sorry! I'll update as I go.

I'll also include my timetable for getting things done at the end. Some things need to be done in advance, some need to be done last minute. With the timetable your derby prep will be a snap! :)


Footnotes:

1yankees.
2 You should totally trust a person who isn't afraid to humiliate her pets for a good party.

You're welcome.
3Not out of any altruistic motives, but entirely because I have 0 time this year and this will help me organize my tasks. You're welcome for that too.
4No one actually likes them. But you have to serve them. Sorry about that.
5Heaven in a cheese spread.
6You're likely surprised to see all these vegetables. Don't panic. There's sugar and/or cream in all of them.
7Except when I accidentally substitute 151 for bourbon and deeply deeply regret my lack of alcohol knowledge.


Mint Juleps 

There are many different ways to make a julep. And there are probably many people out there who will take issue with my method. If you want the traditional recipe, go here. If you want the easy, make ahead version, keep reading.

Make a simple syrup -- this is, shockingly, simple. Mix 1 part boiling water with 2 parts sugar and stir until the sugar is dissolved. Let the mixture cool to room temperature and then add in some mint. More mint if you're going for a more minty flavor, less mint if you're into subtlety. Chill until you're ready to use (at least over night, at most 48 hours).

Strain the mint leaves out and then, in a cup packed with crushed ice, add 2 parts bourbon to each 1 part simple syrup (1 oz to 1/2 oz is recommended). Stir well and serve with an awesome derby swizzle stick if you have one.

This is traditionally served in a julep cup, and I'm proud to say that this year I have 4 shiny pretty julep cups just for that purpose! Only the first 4 guests will get to use them. Everyone else will have to make do with the always classy red solo cups.

Benedictine Cheese

Oh my god I love this stuff. That is all.
Ingredients: 
16 oz cream cheese, softened
1 large cucumber, peeled and minced 
1 medium onion, minced 
1 t mayo 
1/4 t salt 
Wheat thins or other crackers to eat it with

Drain as much water from the cucumber and onions as you can then squeeze the rest of the water out of it. I recommend a cheesecloth. I used to use a paper towel, but then I realized the wonders of the cheesecloth. If you don't most of the water out your cheese will be watery and gross. Ew. 

Mix the cream cheese in the mixer until it's light and fluffy. Blend in the other ingredients and chill. Again, this can be made in advance. A day or two in advance, and it'll keep a day or two after the party if you're lucky enough to have leftovers! 

Hot Browns (serves 6 big sandwiches, 12 small ones)
Ingredients:
12 slices of toast 
Cooked chicken (I generally get a rotisserie chicken and either cut slices or shred it; also, if you're vegetarian you can do portabello mushrooms) 
12 slices of cooked bacon (if you're vegetarian, asparagus) 
4 oz butter 
6 T flour
3 c milk
6 T grated parmesan (plus extra for sprinkling on top) 
1 egg, beaten 
1 cream, whipped (yes!!!) 

So this is an open faced sandwich -- toast on the bottom, chicken (or mushrooms), parmesan cream sauce, topped with bacon (or asparagus) and broiled until bubbly. So the first thing you need to do is make your cream sauce. 

Melt your butter in a pot on the stove. Add in the flour (I use swan's down in a shaker because it's super fine and makes a great smooth sauce) and stir until it's well absorbed. 

Add in the milk and cheese. 

Now add in the egg and continue to stir (careful not to boil!) until all is well incorporated. 

Remove from the heat and fold in the cream and salt and pepper to taste.

For each sandwich place 2 slices of toast in a dish. You can use a gratin dish, or if you're going to have a lot of people, I recommend these paper loaf pans.If you're making little ones just use one piece of toast.

Put the chicken on top, layer in sauce, and cross with bacon on top. 

Stick it under the broiler for a few minutes, just long enough to make the sauce bubbly and a little brown in spots, but not long enough to set your paper loaf pans on fire.

Corn Pudding
Ingredients:
2 1/2 c whole corn (frozen is best). 
2 large eggs, beaten
1 t salt 
pinch of pepper
2T melted butter
3/4 c cream 
2 T - 1/4 c sugar (less if you have sweet corn) 
1 - 2 shakes of nutmeg 

Mix everything together and toss into a baking dish. Seriously simple. Bake at 350 for 15 minutes, stir, and then bake another 20 - 30 minutes until it's nicely browned and the center is set. 

This you can also make the night before and heat up in the oven just before serving.

Dressed Cucumbers
Ingredients: 
2 or 3 cucumbers, peeled and thinly sliced (use a food processor, mandolin, something to make it easier)
1 medium onion, sliced thinly in rings
1 bell pepper, sliced
1 c sugar
2/3 c vinegar
1/2 t salt 
1 t mustard seeds
1 t dill seeds 

Mix it all up. Again. Super simple. Chill it at least 24 hours before serving, and every now and then give it a shake to make sure it all gets mixed up well. 

Bourbon Balls
Ingredients: 
2 1/4 c vanilla wafer crumbs
1 c finely chopped pecans 
1/2 c bourbon 
1 c powdered sugar (+ more for rolling)
3 T cocoa powder 
2 T white corn syrup 

Combine the wafers and the nuts and set aside. Put the remaining ingredients in a bowl and mix well. Pour over the dry ingredients and mix well. With your hands! It's way more fun. 

Roll into balls about 1 inch in diameter and roll in the powdered sugar to coat. Try not to eat too many before completing important tasks. They're more potent than they look.

These can be made well in advance -- up to a week. Alcohol is an excellent preservative! 

Kentucky Derby Party Timetable: 

The derby is always on a Saturday, the first in May, so here you go! 
Wednesday: 
     -Grocery / liquor store run!
     -Make bourbon balls 
     -Make derby pies any time -- see my derby pie recipe about freezing and making ahead.

Thursday: 
      -Make julep simple syrup
      -Make the dressed cucumbers 

Friday: 
     -Make the benedictine cheese 
     -Make the corn pudding

Saturday: 
     -Crush ice 
     -Make juleps, put them in the freezer so they're ready when people arrive. Not too far in advance, you don't want julep pops!
     -Make the toast, cook the bacon, make the sauce for the hot browns. Assemble just before the guests arrive so the toast doesn't get soggy. Cook a few minutes before serving the main course. 
     -Reheat the corn pudding
     -Whip cream for the derby pies

And have the best party ever! Enjoy!

Wednesday, March 14, 2012

Raspberry Goat Cheese Brownies

Hello, I am joining Survival of the Scrumptious for a special guest post! I love Ellen and Thalia's blog and I'm excited to be part of it. I know there's been a lot of chocolate recipes on the blog, including brownie trifle, and plenty of cheesecake recipes, but today's recipe brings both of these together into cheesecake brownies - with a funky twist :)
While I love chocolate, I often find plain brownies to be a little boring, either not enough chocolate flavor, or too sweet. But the tang of the cheesecake in these brownies makes a really nice contrast with the chocolate base and the moisture from the cheesecake layer makes everything rich and fudgy. Also, today's recipe has two special ingredients; raspberries and GOAT CHEESE! I know goat cheese is usually just in salads or fancy mac and cheese, but here it makes it's dessert debut! It's mixed into the cheesecake, so it just adds a bit of a unique flavor without being too overpowering. Try it - you'll like it! Overall the cheesecake and berries make these brownies really indulgent (definitely not boring!), and I love the pretty pink color from the berries too.


I found this recipe on The Kitchn; the original recipe calls for more goat cheese and less cream cheese, but I swapped the proportions since I didn't want it to be too goaty. I used a hand mixer for the cheesecake part of this recipe, and I would recommend having some sort of electric-mixer since the cream cheese can be pretty sticky to mix up. You'll also need a 9 x 13 baking dish.

Ingredients:

Raspberries
1 package frozen raspberries
1 splash (2 tbsp) of alcohol, optional - I used triple sec, since it's fruity and sweet and I had it on hand, but you can use whatever you like

Brownies
8 oz unsweetened chocolate, chopped
2 oz bittersweet chocolate, bars or chips
12 tbsp (1.5 sticks) unsalted butter
1/2 cup milk
2 cups sugar
1 tsp vanilla extract
4 large eggs
1 cup flour
1/4 tsp baking powder
1/2 tsp salt

Cheesecake Layer
4 oz goat cheese, softened at room temperature for an hour
8 oz cream cheese, softened at room temperature for an hour
2 tbsp unsalted butter, softened at room temperature for an hour
1/4 cup sugar
1 egg
1/2 tsp almond extract, if you have it, otherwise just use vanilla

What to do:

1) First, preheat your oven to 350. Then, put your frozen raspberries in a microwave-safe bowl that big enough to stir around in, and defrost in the microwave. Stir them up, add a splash of alcohol, and mush it up a little. Put the berries aside to sit in their juices.

2) Get out a big pot - it's also going to be your brownie batter mixing bowl, so use a big one. If your chocolate is in bar form, cut it up into big chunks (like hershey kiss size) Then put all your chocolate and 12 tbsp butter (also cut the butter into a couple pieces) into the big pot, and put it over a low burner. From here out, the motto is going to be "just keep stirring". About every minute, stir the chocolate around and scrape down the sides so the chocolate doesn't burn.


You can see mid-melt (left) and
after, when it's all smooth (right).


You can also use this time to help your cheesecake ingredients soften up by putting them on the warm stovetop - just don't leave them there too long or they'll melt!


3) Take the chocolate mixture off the heat. And now we're just going to stir in a lot of ingredients! I used a wire whisk at this point to really integrate the ingredients, and used the rubber spatula to scrape down the sides every now and then. First up, add in the milk. It'll look a little chunky, just keep stirring, it'll smooth out.


4) Next, add the 2 cups sugar and vanilla - whisk to combine, scrape to get the sides. Add the eggs one at a time - repeat the stir and scrape after each one. Add the flour, baking powder, and salt - you can just use the rubber spatula here to gently mix in the flour - stop when you can no longer see the dry flour. Gently mix in about half of the raspberries and their juices. You have batter!

5) Grease your 9 x 13 baking dish - you can use PAM spray, or just take a glob of butter in a paper towel and schmear it around. Tip for sprayers - put the pan either in the sink or on the open door of your dishwasher so that the extra mist doesn't get your kitchen oily.

6) Pour the batter into the pan, spread it out. Now you may lick the utensils and chocolate pot!
7) Now, onto the cheesecake layer! Get out the electric mixer and a big bowl. Put your softened cream cheese into the bowl, and break it up with mixer. Then add in the goat cheese, and stir again. And the butter, and stir again.Once the dairy is all combined, add the sugar and mix some more.

8) Now, add the egg and extract, and mix again. It'll become smooth and fluffy.

9) Get the remaining raspberries and juices, and stir them into the cheesecake mixture - you'll get such a pretty color pink!
10) Plop the cheesecake layer on top of the brownie layer, swirl it in, and then smooth the top over.


11) Bake for 30 minutes at 350. It's difficult to know when the brownies are done, so just try to see if the cheeecake layer looks dry, with some small cracks, and some light browning.

12) The hardest part, for sure, but let the brownies cool before you cut into them! Then serve with ice cream!