Tuesday, April 24, 2012

How to host a Kentucky Derby Party (with footnotes)

It's that time of year again! Time for the best, the most ridiculous, the most strange, and importantly the most delicious party ever -- a Kentucky Derby party! For those of you1 who don't know what the Kentucky derby is, let me be your guide. You should totally trust me. I'm an expert2.

The Kentucky derby is an event at which people wear awesome hats, eat derby pie, drink mint juleps, and I guess some horses run around a track or something. But, let's be honest, it's really all about the hats and the food.
Hats of Shame. If you come to my party without a hat. Consider this fair warning.

I'm going to give you lots of details about how you, too, can host your own derby party3! But this time I'm afraid it will be details only on the food. You'll have to wait until next year, or whenever I have time again, to learn about the hats and the betting etc.

So. Let's start with the menu. Here's what I recommend.

Start with mint juleps4 and benedictine cheese5.
Julep fixins, benedictine cheese, and deviled eggs. Also a good addition.

For the main course, I serve hot browns, corn pudding, and dressed cucumbers6.
Hot browns. Hungry just looking at them.

And for dessert I serve derby pies and bourbon balls7.
Derby pie in jars!!

Delicious! So, I'm going to give you recipes for all of these below (except the derby pie, which rightly deserves its own post). But, because I haven't actually done any cooking yet this year, the post will temporarily be pictureless. Sorry! I'll update as I go.

I'll also include my timetable for getting things done at the end. Some things need to be done in advance, some need to be done last minute. With the timetable your derby prep will be a snap! :)


Footnotes:

1yankees.
2 You should totally trust a person who isn't afraid to humiliate her pets for a good party.

You're welcome.
3Not out of any altruistic motives, but entirely because I have 0 time this year and this will help me organize my tasks. You're welcome for that too.
4No one actually likes them. But you have to serve them. Sorry about that.
5Heaven in a cheese spread.
6You're likely surprised to see all these vegetables. Don't panic. There's sugar and/or cream in all of them.
7Except when I accidentally substitute 151 for bourbon and deeply deeply regret my lack of alcohol knowledge.


Mint Juleps 

There are many different ways to make a julep. And there are probably many people out there who will take issue with my method. If you want the traditional recipe, go here. If you want the easy, make ahead version, keep reading.

Make a simple syrup -- this is, shockingly, simple. Mix 1 part boiling water with 2 parts sugar and stir until the sugar is dissolved. Let the mixture cool to room temperature and then add in some mint. More mint if you're going for a more minty flavor, less mint if you're into subtlety. Chill until you're ready to use (at least over night, at most 48 hours).

Strain the mint leaves out and then, in a cup packed with crushed ice, add 2 parts bourbon to each 1 part simple syrup (1 oz to 1/2 oz is recommended). Stir well and serve with an awesome derby swizzle stick if you have one.

This is traditionally served in a julep cup, and I'm proud to say that this year I have 4 shiny pretty julep cups just for that purpose! Only the first 4 guests will get to use them. Everyone else will have to make do with the always classy red solo cups.

Benedictine Cheese

Oh my god I love this stuff. That is all.
Ingredients: 
16 oz cream cheese, softened
1 large cucumber, peeled and minced 
1 medium onion, minced 
1 t mayo 
1/4 t salt 
Wheat thins or other crackers to eat it with

Drain as much water from the cucumber and onions as you can then squeeze the rest of the water out of it. I recommend a cheesecloth. I used to use a paper towel, but then I realized the wonders of the cheesecloth. If you don't most of the water out your cheese will be watery and gross. Ew. 

Mix the cream cheese in the mixer until it's light and fluffy. Blend in the other ingredients and chill. Again, this can be made in advance. A day or two in advance, and it'll keep a day or two after the party if you're lucky enough to have leftovers! 

Hot Browns (serves 6 big sandwiches, 12 small ones)
Ingredients:
12 slices of toast 
Cooked chicken (I generally get a rotisserie chicken and either cut slices or shred it; also, if you're vegetarian you can do portabello mushrooms) 
12 slices of cooked bacon (if you're vegetarian, asparagus) 
4 oz butter 
6 T flour
3 c milk
6 T grated parmesan (plus extra for sprinkling on top) 
1 egg, beaten 
1 cream, whipped (yes!!!) 

So this is an open faced sandwich -- toast on the bottom, chicken (or mushrooms), parmesan cream sauce, topped with bacon (or asparagus) and broiled until bubbly. So the first thing you need to do is make your cream sauce. 

Melt your butter in a pot on the stove. Add in the flour (I use swan's down in a shaker because it's super fine and makes a great smooth sauce) and stir until it's well absorbed. 

Add in the milk and cheese. 

Now add in the egg and continue to stir (careful not to boil!) until all is well incorporated. 

Remove from the heat and fold in the cream and salt and pepper to taste.

For each sandwich place 2 slices of toast in a dish. You can use a gratin dish, or if you're going to have a lot of people, I recommend these paper loaf pans.If you're making little ones just use one piece of toast.

Put the chicken on top, layer in sauce, and cross with bacon on top. 

Stick it under the broiler for a few minutes, just long enough to make the sauce bubbly and a little brown in spots, but not long enough to set your paper loaf pans on fire.

Corn Pudding
Ingredients:
2 1/2 c whole corn (frozen is best). 
2 large eggs, beaten
1 t salt 
pinch of pepper
2T melted butter
3/4 c cream 
2 T - 1/4 c sugar (less if you have sweet corn) 
1 - 2 shakes of nutmeg 

Mix everything together and toss into a baking dish. Seriously simple. Bake at 350 for 15 minutes, stir, and then bake another 20 - 30 minutes until it's nicely browned and the center is set. 

This you can also make the night before and heat up in the oven just before serving.

Dressed Cucumbers
Ingredients: 
2 or 3 cucumbers, peeled and thinly sliced (use a food processor, mandolin, something to make it easier)
1 medium onion, sliced thinly in rings
1 bell pepper, sliced
1 c sugar
2/3 c vinegar
1/2 t salt 
1 t mustard seeds
1 t dill seeds 

Mix it all up. Again. Super simple. Chill it at least 24 hours before serving, and every now and then give it a shake to make sure it all gets mixed up well. 

Bourbon Balls
Ingredients: 
2 1/4 c vanilla wafer crumbs
1 c finely chopped pecans 
1/2 c bourbon 
1 c powdered sugar (+ more for rolling)
3 T cocoa powder 
2 T white corn syrup 

Combine the wafers and the nuts and set aside. Put the remaining ingredients in a bowl and mix well. Pour over the dry ingredients and mix well. With your hands! It's way more fun. 

Roll into balls about 1 inch in diameter and roll in the powdered sugar to coat. Try not to eat too many before completing important tasks. They're more potent than they look.

These can be made well in advance -- up to a week. Alcohol is an excellent preservative! 

Kentucky Derby Party Timetable: 

The derby is always on a Saturday, the first in May, so here you go! 
Wednesday: 
     -Grocery / liquor store run!
     -Make bourbon balls 
     -Make derby pies any time -- see my derby pie recipe about freezing and making ahead.

Thursday: 
      -Make julep simple syrup
      -Make the dressed cucumbers 

Friday: 
     -Make the benedictine cheese 
     -Make the corn pudding

Saturday: 
     -Crush ice 
     -Make juleps, put them in the freezer so they're ready when people arrive. Not too far in advance, you don't want julep pops!
     -Make the toast, cook the bacon, make the sauce for the hot browns. Assemble just before the guests arrive so the toast doesn't get soggy. Cook a few minutes before serving the main course. 
     -Reheat the corn pudding
     -Whip cream for the derby pies

And have the best party ever! Enjoy!

Wednesday, March 14, 2012

Raspberry Goat Cheese Brownies

Hello, I am joining Survival of the Scrumptious for a special guest post! I love Ellen and Thalia's blog and I'm excited to be part of it. I know there's been a lot of chocolate recipes on the blog, including brownie trifle, and plenty of cheesecake recipes, but today's recipe brings both of these together into cheesecake brownies - with a funky twist :)
While I love chocolate, I often find plain brownies to be a little boring, either not enough chocolate flavor, or too sweet. But the tang of the cheesecake in these brownies makes a really nice contrast with the chocolate base and the moisture from the cheesecake layer makes everything rich and fudgy. Also, today's recipe has two special ingredients; raspberries and GOAT CHEESE! I know goat cheese is usually just in salads or fancy mac and cheese, but here it makes it's dessert debut! It's mixed into the cheesecake, so it just adds a bit of a unique flavor without being too overpowering. Try it - you'll like it! Overall the cheesecake and berries make these brownies really indulgent (definitely not boring!), and I love the pretty pink color from the berries too.


I found this recipe on The Kitchn; the original recipe calls for more goat cheese and less cream cheese, but I swapped the proportions since I didn't want it to be too goaty. I used a hand mixer for the cheesecake part of this recipe, and I would recommend having some sort of electric-mixer since the cream cheese can be pretty sticky to mix up. You'll also need a 9 x 13 baking dish.

Ingredients:

Raspberries
1 package frozen raspberries
1 splash (2 tbsp) of alcohol, optional - I used triple sec, since it's fruity and sweet and I had it on hand, but you can use whatever you like

Brownies
8 oz unsweetened chocolate, chopped
2 oz bittersweet chocolate, bars or chips
12 tbsp (1.5 sticks) unsalted butter
1/2 cup milk
2 cups sugar
1 tsp vanilla extract
4 large eggs
1 cup flour
1/4 tsp baking powder
1/2 tsp salt

Cheesecake Layer
4 oz goat cheese, softened at room temperature for an hour
8 oz cream cheese, softened at room temperature for an hour
2 tbsp unsalted butter, softened at room temperature for an hour
1/4 cup sugar
1 egg
1/2 tsp almond extract, if you have it, otherwise just use vanilla

What to do:

1) First, preheat your oven to 350. Then, put your frozen raspberries in a microwave-safe bowl that big enough to stir around in, and defrost in the microwave. Stir them up, add a splash of alcohol, and mush it up a little. Put the berries aside to sit in their juices.

2) Get out a big pot - it's also going to be your brownie batter mixing bowl, so use a big one. If your chocolate is in bar form, cut it up into big chunks (like hershey kiss size) Then put all your chocolate and 12 tbsp butter (also cut the butter into a couple pieces) into the big pot, and put it over a low burner. From here out, the motto is going to be "just keep stirring". About every minute, stir the chocolate around and scrape down the sides so the chocolate doesn't burn.


You can see mid-melt (left) and
after, when it's all smooth (right).


You can also use this time to help your cheesecake ingredients soften up by putting them on the warm stovetop - just don't leave them there too long or they'll melt!


3) Take the chocolate mixture off the heat. And now we're just going to stir in a lot of ingredients! I used a wire whisk at this point to really integrate the ingredients, and used the rubber spatula to scrape down the sides every now and then. First up, add in the milk. It'll look a little chunky, just keep stirring, it'll smooth out.


4) Next, add the 2 cups sugar and vanilla - whisk to combine, scrape to get the sides. Add the eggs one at a time - repeat the stir and scrape after each one. Add the flour, baking powder, and salt - you can just use the rubber spatula here to gently mix in the flour - stop when you can no longer see the dry flour. Gently mix in about half of the raspberries and their juices. You have batter!

5) Grease your 9 x 13 baking dish - you can use PAM spray, or just take a glob of butter in a paper towel and schmear it around. Tip for sprayers - put the pan either in the sink or on the open door of your dishwasher so that the extra mist doesn't get your kitchen oily.

6) Pour the batter into the pan, spread it out. Now you may lick the utensils and chocolate pot!
7) Now, onto the cheesecake layer! Get out the electric mixer and a big bowl. Put your softened cream cheese into the bowl, and break it up with mixer. Then add in the goat cheese, and stir again. And the butter, and stir again.Once the dairy is all combined, add the sugar and mix some more.

8) Now, add the egg and extract, and mix again. It'll become smooth and fluffy.

9) Get the remaining raspberries and juices, and stir them into the cheesecake mixture - you'll get such a pretty color pink!
10) Plop the cheesecake layer on top of the brownie layer, swirl it in, and then smooth the top over.


11) Bake for 30 minutes at 350. It's difficult to know when the brownies are done, so just try to see if the cheeecake layer looks dry, with some small cracks, and some light browning.

12) The hardest part, for sure, but let the brownies cool before you cut into them! Then serve with ice cream!


Tuesday, March 13, 2012

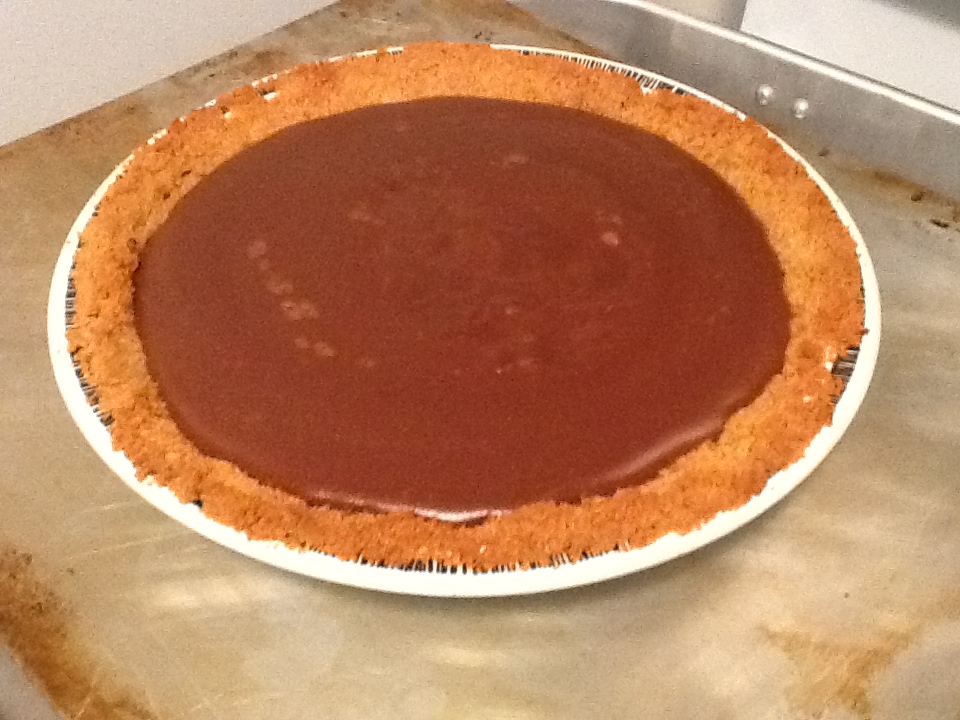
Pi Pie -- Chocolate Meringue Pie

It's here! It's really here! One of the nerdiest holidays ever -- pi day! Naturally pi day is observed every March 14 (3.14) and the celebration of pi kicks off at 1:59 (3.14159...). How does one celebrate pi day? Well, there are many ways.
(1) You could wear a dorky math t-shirt (I'm not even going to tell you how many I have. Suffice it to say, it's more than 1).
(2) You could do some trigonometry-- what is the length of a 24 degree arc of a circle with a radius of 5?*
(3) You could eat some pie! Pizza pie, dessert pie, even quiche! Whatever kind of pie you can find!

To celebrate pi day I decided to make a pie I've been craving for a while -- a chocolate meringue pie. A rich smooth chocolate pie, topped with a light fluffy and not too sweet meringue. This is truly a hit or miss pie -- I've had amazing chocolate meringue pies, and I've had terribly tragic chocolate meringue pies.

Given this chanciness I've had my eyes out for a good chocolate meringue pie recipe for a while, unfortunately none of them looked chocolatey enough for me. How can you call yourself a chocolate pie if all the chocolate in the recipe is 2 T of cocoa powder? Disgraceful.

And then I found this recipe from pie maven. Pie maven really gets pie. And when pie maven makes a chocolate pie, pie maven makes a chocolate pie. None of this smidgeon of cocoa powder nonsense. No. Four whole ounces of honest to goodness chocolate. A chocolate meringue recipe worthy of pi day.

I made some minor adjustments to the recipe entirely based on what I had on hand, and what I ended up with is beautiful. And the bits I tasted when I first licked the spoon (and then um... licked the pan too) have me convinced that it'll be delicious when I bisect its diameter tomorrow and serve it up to fellow pi enthusiasts.

So, happy pi day to all! Let me know how you celebrate! 

*2pi/3, if you're curious

Chocolate Meringue Pie

Pie Crust:
1 1/4 c graham cracker crumbs
6 T melted butter
3 T sugar

Filling:
4 egg yolks (reserve the whites for the meringue)
1/2 c sugar
2 T cornstarch
2 c milk
4 oz coarsely chopped chocolate (I used half bittersweet and half semisweet)

Meringue:
4 egg whites (set aside at room temperature for 10 or 15 minutes, while you make the pie)
1/2 t cream of tartar 
8 T sugar

Heat the oven to 375 degrees. Mix together the graham cracker crumbs and sugar. Add the butter and mix well until combined.

Press the mixture into a 9" pie plate, mushing it in against the sides of the plate.

Bake for 8 minutes until it's golden brown, then remove from the oven and set aside. Then reduce the oven temperature down to 350.

Make the filling. First, mix together the cornstarch and the sugar.

Then beat the egg yolks in a saucepan. Sift in the sugar / cornstarch mixture (to prevent lumps) and mix well.

While stirring, add the milk in a constant stream. Give it another stir or two to make sure it's all well incorporated.

Heat over medium heat until the custard has thickened. It took about 5 - 7 minutes, and if you have any doubt that it's thickened keep going. It'll become obviously thicker when it's ready.

Add in the chocolate and stir well, continuing to heat until the chocolate is melted, the custard is thick, and bubbles just start to break the surface.

Pour into the pie crust.

Next, make the meringue. This is easy. Don't panic! There are a few things you need to know about meringue, and if you pay close attention to them you will always get a nice meringue.

(1) Eggs at room tempreature
(2) Cream of tartar is amazing
(3) Use a clean, dry, stainless steel bowl. Whatever you do, don't use plastic.
(4) If fats or oils get into your meringue it'll never rise so be very careful no yolk gets in your egg whites.

Keeping those things in mind, here's what you do.

Beat your eggs and cream of tartar until medium peaks form. Medium peaks mean that the meringue will hold its shape, but the tips generally fold back on themselves. Sorry, I forgot to take a picture. Here's a picture of my mixer instead:

Add in the sugar and continue beating until the sugar is dissolved and stiff peaks form. You know the sugar is dissolved when you rub a little meringue between your fingers and it doesn't feel grainy, and you know you have stiff peaks when the peaks stand up. It'll also be nice and glossy and shiny.

Use a spatula to spread the meringue over top your custard pie. Be sure to seal the pie (cover all the way to the edges, making sure the custard is covered) to prevent your pie from getting funky.

Bake at 350 for 15 - 20 minutes, or until your meringue has a nice golden color to it. Check it towards the end to make sure it doesn't burn.

It's best served a few hours after baking at room temperature, but if you make it in advance refrigerate it and then let it stand a room temperature a little bit until you're ready to serve! Enjoy!

Sunday, February 19, 2012

Croissants: A little bit of flaky heaven

Croissants. Flaky and crispy on the outside, soft and buttery and delicious on the inside. Fabulous, delicious, and only available in bakeries, where the croissant fairy makes them appear, because my god no one could actually make pastry like that on their own, right?

Wrong.

And you know what? It's surprisingly easy. I know many of you are rolling your eyes at me disbelievingly (is that a word?), but seriously. Not hard. The secret to making delicious croissants boils down to one thing: butter.

Dear god, the butter. It's really indecent. Basically, all you do is take 3 sticks of butter. I'll stop and let you process that for a minute.


You take 3 sticks of butter and beat it into a butter square. An 8" X 8" square of butter... more time to process the wonder of a giant butter square...

Then you fold the butter square into your croissant dough, roll it, fold it, roll it, fold it, roll it, until you have layers of dough alternating with butter. That's how you get the flake.

Dough alternating with butter. Heaven.

The most high-tech cooking tool you need is a good rolling pin. And I have a great one -- my friend Gwen brought back the biggest, heaviest, most amazing rolling pin from Peru for me. I'm not sure how she did it because it is seriously 2 feet tall and weighs like 10 pounds, and it must have taken up a huge portion of her suitcase. But I certainly appreciate the effort (and wish she weren't back in Peru so she could enjoy the croissants too!).

It takes forever to make the croissants, but most of the time is time for the dough and the butter to chill in the fridge. The actual amount of time you spent hands on is pretty minimal, so don't be intimidated. You can do it.

Croissants

Ingredients:

3 tablespoons + 3 sticks of cold butter
1 3/4 c whole milk
4 t yeast
4 1/2 c flour
1/4 c sugar
2 t + a pinch of salt
1 egg
1 t cold water

First, melt the 3 T butter over low heat. Once it's melted, remove from the heat and add in the milk. Check the temperature here, it should be around 85 degrees (between 80 and 90). If it's too cool, heat it up a bit, if it's too warm, let it cool some.

Whisk in the yeast, and once combined move to the bowl of a standing mixer fitted with a dough hook attachment (if you don't have a dough hook, no fear, just use your hands!).

Add the flour, sugar, and 2 t of salt. Knead on low speed until a cohesive dough forms. This took about 3 or 4 minutes.

Then increase the speed to medium-low (2 on the kitchenaid) and knead for 1 minute.

Remove from the mixer, cover with plastic wrap, and let the dough rest for half an hour at room temperature.

In the meantime, line a baking sheet with parchment paper (or wax paper if you don't have parchment paper). Shape the dough into a vague 10" X 7" rectangle and wrap with plastic wrap and refrigerate for 2 hours.

While the dough is in the refrigerator, make an 8" X 8" parchment paper square -- cut a 24" length of parchment paper and fold it in half length-wise to make a 12" rectangle. Then fold over the 3 open sides to make an 8" square with enclosed sides. Really crease the sides well, because you're going to stick butter in there and beat the hell out of it, and you don't want it to ooze.

Now, take your 3 sticks of butter, put them near each other and just start whacking them with your rolling pin. Beat it and beat it some more for about a minute. Basically, you want it to make your 3 sticks of butter into one butter blob.

Use an offset spatula, a cake server, whatever you've got, to scrape the butter up off the counter and put it into the parchment paper envelope. Turn the envelope over so the folds are underneath, and roll roll roll until the butter fills the entire envelope and you have an 8" X 8" butter square.

Refrigerate at least 45 minutes.

Pull the dough from the fridge into the freezer for half an hour. Then you're going to do something fancy called "laminating" the dough. This doesn't involve putting plastic coating around the dough, but rather, involves squishing butter between dough layers.

Get the dough from the freezer and turn it out onto a lightly floured surface. Roll it into a 17" X 8" rectangle with the long side parallel to the edge of the counter. Place the butter square on the middle of your dough rectangle, and fold the sides of the dough over the butter so they meet in the middle.

Press the seam together with your fingers, and press the edges of the dough sealed with your rolling pin.

Roll out the dough lengthwise into a 24" X 8" rectangle, then fold the dough into thirds to an 8" square.

Turn the dough 90" counterclockwise, and roll out lengthwise again to a 24" X 8" rectangle. Fold into thirds again to make another 8" square.

Place the dough on the baking sheet, wrap with plastic, and pop back in the freezer for half an hour.

Do it all again -- place your dough on a lightly floured surface, roll it out lengthwise to a 24" X 8" rectangle, fold into thirds and place back on the sheet. Wrap with plastic wrap and refrigerate for 2 hours (or overnight).

Again, pop the dough in the freezer for half an hour before removing it and placing it on a lightly floured counter and rolling it into an 18" X 16" rectangle (with the long side parallel to the edge of the counter.

Fold the top half of the dough over the bottom half to make a double layer of dough.

Get out your measuring tape, and measure 3 inch segments along the bottom, marking each segment with a small slice with a knife (you should have 5 cuts). For some reason I didn't take pictures of this. Oops.

Along the top, measure in 1 1/2 inches, then 3 inches from that, again making slits in the dough at each segment (you should have 6 cuts).

Use a knife to cut from the top left-most mark down to the first bottom mark. Keep going, cutting from mark to mark, until you have 12 triangles and 5 diamonds. Unfold the diamonds and cut into 10 triangles.

Now shape your croissants! Cut a small (1.5" slit) in the top (widest part) of your croissant. Tug on each of these points and the bottom skinny point. Then starting with the top, roll the top part down toward the point, stretching the bottom point out and tucking it underneath.

Curve them into a crescent and repeat with the remaining triangles.

Place your crescents on a parchment-lined baking sheet (at least 2.5" apart), wrap with plastic wrap, and let stand until nearly doubled, 2 1/2 - 3 hours. At this point you can also refrigerate up to 18 hours or freeze.

Preheat the oven to 425 degrees. Whisk egg, 2 t cold water, and a pinch of salt together, and brush on top of the croissants.

Place the croissants in the oven, and reduce the temperature down to 400. Bake for 10-11 minutes and then rotate and switch location of the baking sheets. Bake until golden brown, 5-8 minutes more. Watch them carefully, ovens differ!
Enjoy!

Saturday, February 4, 2012

"Super Bowl" Cookie Dough Dip

Last week I gave a talk in our department about some of my recent research on choking under pressure. I usually include a few examples to make sense of this phenomena, and there are some examples that make complete sense to the academic in me -- flubbing a big exam. Yes. I get that. But every other example in the literature is about sports.
Sports.
Ugh.
(Just to show you how completely sports challenged I am, I asked my brother in law at Christmas what one does with batting gloves (a brilliant christmas gift from my uncle) -- "does one wear them when one throws the bat?" I asked. No. Apparently you don't throw a bat.)
Anyway, as I was prepping this talk, one of my friends mentioned that there had just been an example in a football game in which one team lost their chance at the super bowl because one of their players fumbled. Don't ask me what a fumble is. Falling down? Punching someone (they do a lot of that in football, right?)? Doing pirouettes? Hell if I know.
It was at this point in my life that I learned that I say super bowl as if it has virtual quotes around it. "Super bowl".
Sigh.
Anyway, I am going to a "super bowl" party tomorrow. So I googled "super bowl desserts" and found this cookie dough dip. I was totally sold! Cookie dough is great! And apparently dipping foods in other foods is a staple of "super bowl" parties the world over. That is, I was on board until I got to all the bit about the chickpeas. Who puts chickpeas in a dessert? That's just wrong.
SO, I figured out how to make it totally unhealthy. Cream cheese. And butter. And, because I had reeses' cups sitting around, I threw those in too. And I put it in a jar because everything is better in a jar!

Peanut Butter Chocolate Chip Cookie Dough Dip

Ingredients: 
8 oz cream cheese
1/2 c softened butter
1 c powdered sugar
2 T brown sugar
2 t vanilla
2 - 4 reeses' cups 
1 c chocolate chips 
1 c peanut butter chips 

First cream the cream cheese and butter. 

Then add the powdered sugar and mix some more. 

And the brown sugar and vanilla. Mix well. 

I only had 2 reeses' cups, but I think it would be even better with more! Throw them in the mixer and mix mix mix! 

Add in the chocolate chips and peanut butter chips and mix. 

And you're done! Seriously. That's it. Serve with graham crackers for dipping. Delicious!