Sunday, June 23, 2013

Chocolate Pots de Creme with Salted Caramel Whipped Cream

So after my last post Thalia was SHOCKED that I had written up something semi-healthy (can't blame her, really)! In fact, I quote: "I demand something with a lot of fat, sugar, processed cereal, and, um, absolutely no redeeming value. I demand that we all roll around on the floor in bliss/agony when we finish eating it."


Twist my arm.

I couldn't quite work in the processed cereal, but I've covered most of the other bases -- fat (heavy cream, butter, the best kind of fats!), sugar (sugar sugar, caramelized sugar), no redeeming value (this is NOT runner approved, but it's cool, I ran 15 miles this weekend and don't have to run tomorrow at all so it's almost as if I'm not really a runner), and Oh Yes. Yes, you will be rolling around on the floor in bliss / agony when you are finished.

In fact, you may not have to wait until you're finished. While I often find myself taste-testing as I go, I generally don't go crazy. But this time. Oh this time. I won't go into too much detail, but I will just say that when some of the salted caramel whipped cream went splat on the counter I viewed it as an opportunity, not a tragedy.

By the way, yes you read that right. SALTED CARAMEL WHIPPED CREAM. Swoon!

Although I should, of course, be taking advantage of strawberries, raspberries, delicious light summer fruity things, I have no guilt. This is not a recipe that should be relegated to cooler months. This. This is perfect. It's not heavy at all, it's light and airy, and perfect for the summer cookout that I'm going to be late for if I don't get moving.

Chocolate Pots de Creme with Salted Caramel Whipped Cream 
Ingredients: 

Pots de Creme

10 oz good quality semisweet chocolate 
5 large egg yolks 
4 T sugar
1/4 t coarse salt 
1 1/2 c heavy cream 
3 1/2 T melted butter
3/4 c milk 
1 t vanilla 
1/2 t instant espresso powder mixed with 1 T water 

Salted Caramel Whipped Cream

1/2 c sugar
3T butter
1 1/4c heavy cream (separated) 
1 t vanilla
A pinch of coarse salt 


First, coarsely chop your chocolate and put in a heat proof bowl. You're going to need a strainer for your custard, so go ahead and get that ready. 


Whisk together your yolks, sugar and salt in a medium saucepan. Then add in the heavy cream, butter and milk, whisking to combine.


Cook over medium-low. You've gotta be really careful with custard that you don't overcook it or let it simmer, so stir it constantly and keep a close eye on the temperature. As soon as it reaches 175-180 degrees take it off the heat. That took me about 10 minutes.


Pour your custard through the strainer over the chocolate and let it sit for about 5 minutes to give the chocolate time to get deliciously melty.


Whisk! And add the vanilla and espresso / water mixture. Whisk more!


Divide into 8 ramekins or 6-half pint jars. I put 5 1/2 oz in each jar and it worked out perfectly. Tap gently against the counter to remove any air bubbles, and use a damp paper towel to clean up any chocolate that got on your jars.

Cool to room temperature and then cover and refrigerate for at least 4 hours.


In the meantime, make the caramel! This is always scary. But I believe in you. You've got this.

Put the sugar in a small saucepan over high heat. Stir. Stir. Stir. And don't stop stirring. Ever. Also, don't ever use a whisk for this. It gets messy and sad. And NEVER use plastic because caramel will melt that SO fast. Wooden spoons are best!
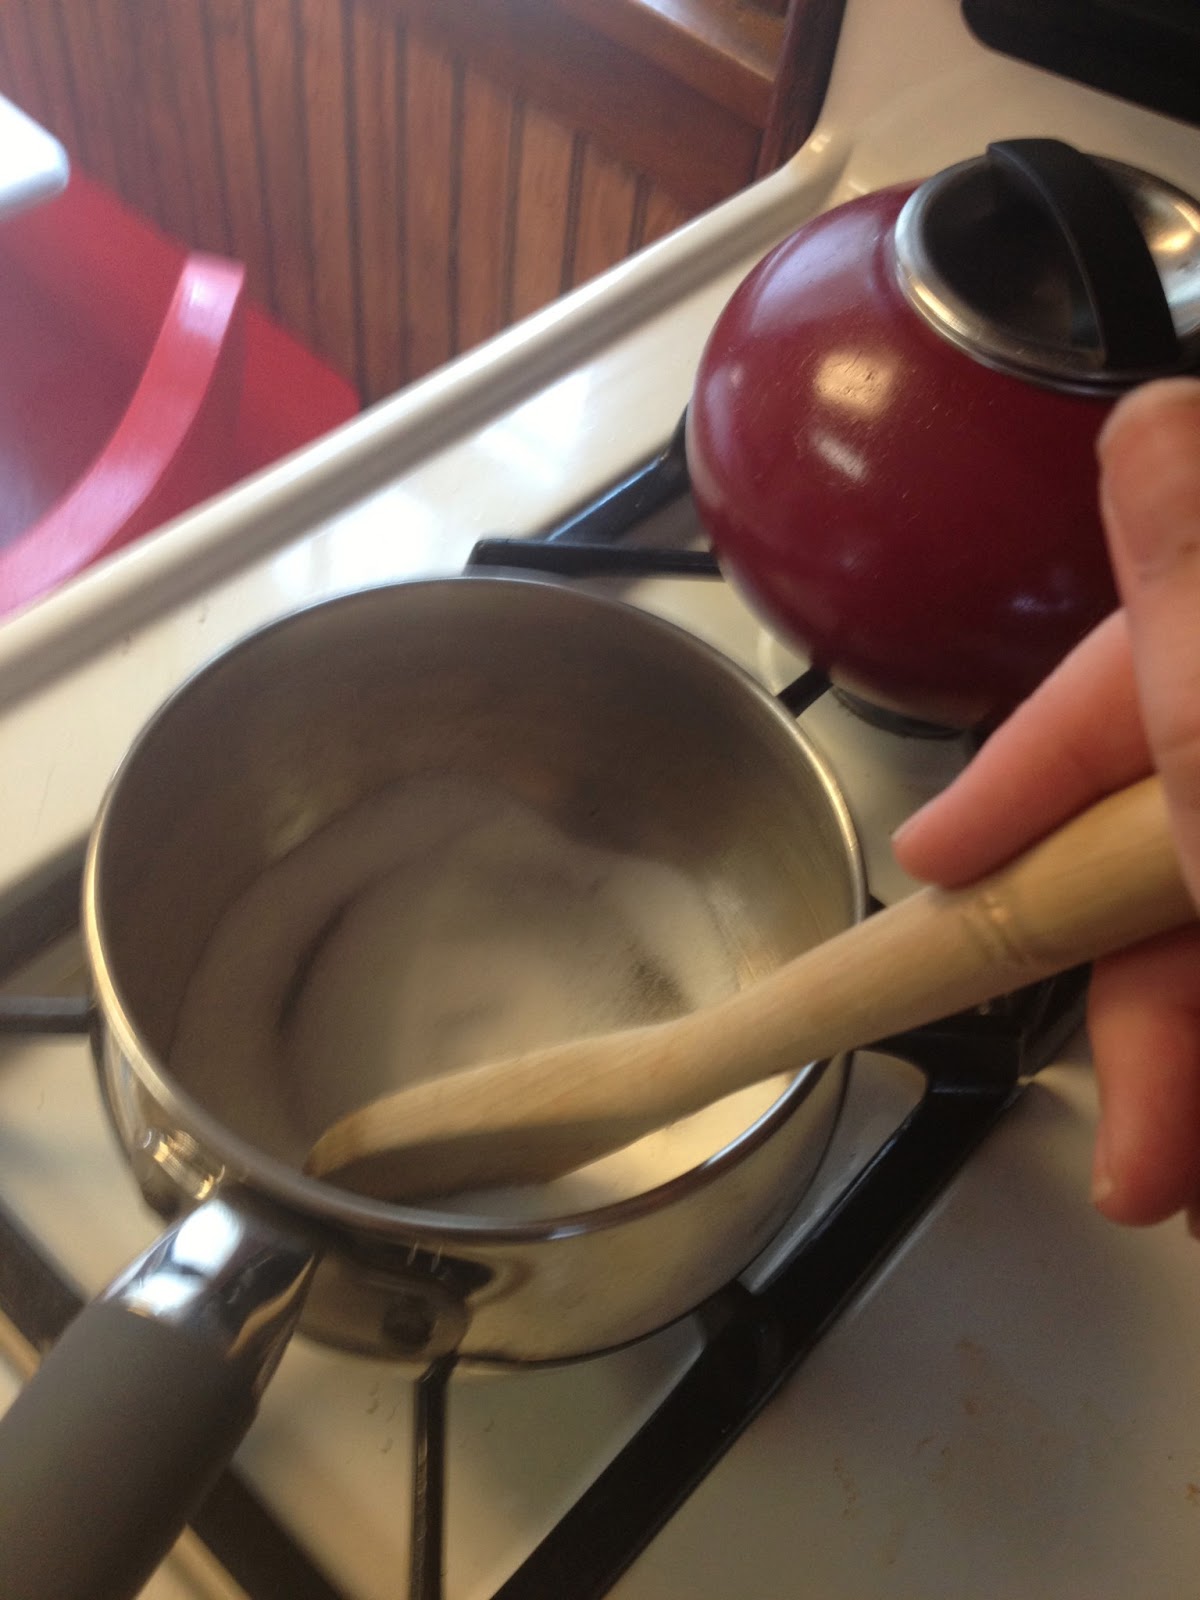

As soon as all the sugar has melted toss in the butter. Keep stirring! Stir stir stir! But watch out because it's going to bubble like some kind of toil and trouble.


You thought that was bubbly? Once the butter melts, add in the cream. Stand back! But keep stirring!


Once that's all added and stirred, take it off the heat, add the vanilla, and let it cool to room temperature. Then add the pinch of salt, stick it in a little jar and pop it in the fridge for a bit.


In the meantime, shred some chocolate flakes! Use a vegetable peeler! Why else would I own a vegetable peeler??


When you're getting close to go - time whip your cream until it's pretty stiff. Not butter, but a bit stiffer than you would ordinarily go for as a topping. 


Toss in the caramel. Whip! Then top your pots de creme with your whipped cream (I use a pastry bag to keep things neat). And sprinkle with chocolate shavings. And enjoy!


Friday, June 21, 2013

Raspberry Frozen Yogurt

I know. I know. I have a lot of explaining to do. It's been almost a year (!) since I posted anything. I'm the worst. The WORST. In my defense, a lot's happened in the last year! I got a tenure-track job (yay!), I moved 1000 miles away to an enormous kitchen (the rest of the house is pretty big too), and inexplicably I took up running absurd distances.

My dad and I after my first marathon! Hope I'll still be standing after the next one! 
It's those last two points that bring me to today's post -- I've been in my new house for just over a week and have hardly done ANYTHING fun in my truly fantastically cavernous new kitchen. Sadness.
BIG KITCHEN! RED CHAIRS! 
And why's that? Why have I been so bad about baking lately? Running. It's totally running's fault. Not only does it suck up nearly ALL my free time, but it also means I have to be careful about what I eat. Apparently dessert is a "special occasion" food when you're trying to run 30-40 miles a week. Not cool. But it does explain why I'm so excited to celebrate national insurance awareness day next week (claims cupcakes or adjustment apple tart, anyone?).

Tonight I really REALLY wanted to have something fabulous for dessert, but I'm going on a long run super SUPER early tomorrow morning and I know that fabulous desserts the night before a long run are not runner approved. Sigh.

So I googled "dessert recipes for runners". Don't do that. Learn from my mistake. Don't do it. Beans. BEANS. FOR DESSERT. WHY?? Runners eat the worst shit. Do I want bean, bananas (sore subject for this primatologist), or raisins (why? they make you think they're chocolate chips and then destroy all your hopes and dreams)? No. No I don't. I want ice cream. And I want it now.

So, as a compromise, I present you with Raspberry Frozen Yogurt. Add in some protein powder (which I did) and it'll be totally acceptable to eat frozen yogurt for breakfast before hitting the pavement. Which is absolutely what I will be doing at 5:30 tomorrow morning.

Raspberry Frozen Yogurt
3/4 container of Chobani frozen yogurt (about 1lb 10 oz, I used plain but use whatever flavor floats your boat)
6 oz orange juice (3/4 cup)
1 package frozen raspberries
6 scoops of protein powder (if you're so inclined, or enough for 3 servings if you've got a big scoop)

Combine all these things in the bowl of a food processor or blender.

Blend! Food process! Combine! 


 Until it's all pretty and smooth-ish like so.


Toss in the bowl of an ice cream maker (or skip this step and just freeze).


Let it go for 20 minutes until it's all firmed up.


I scooped mine into jars, because, well, I would, wouldn't I? And freeze!


Eat. Run. Enjoy!
Tuesday, March 26, 2013

Thalia Learns to Cook: Bread! (With slight cheating)

Blah blah blah, it's been too long, life got in the way, I moved and kids take up way more time than they show you on TV. Seriously. Time suck like I never knew.

However, it's spring break!  And you know what that means! Getting drunk on watered down tequila shots while wearing a bikini at 11:15am!

Nope.

It means I get to work from home writing papers and prepping lectures instead of having to put on heels and work from my office.  Hooray!

And! It means I finally get to bake some bread that I've been meaning to try since late December.

Our lovely friends Colin and Liz gave us a traditional "welcome to your new home" present--beer, bread, and salt. The beer was drunk quickly.  The salt is fancy and requires a fancy salt grinder, which I promise to buy at some point in the next, oh, 3-5 years.  The bread looks delicious, but requires some time commitment. Apparently you have to work on it and then wait and then work on it and then wait for several long spans.  Happily, I can write during these waiting periods, so I decided to make bread. For the first time ever. Without a bread machine. And even more happily, since I did not know how to do this or how it would turn out, I thought I would document the process for the blog. In a "Survival of the Scrumptious" first, I'm actually writing parts of this post while in the act of waiting for the bread to rise. You know, instead of revising that manuscript I'm supposed to be rewriting this week.  I'm nothing if not magnanimous.

It's a mix. Slightly cheating. 

10-Grain Bread.  Made from a mix, so I'm not actually getting too fancy here, sorry.

Bob's Red Mill 10 Grain Bread Mix
Makes 1 1/2lb Loaf

Ingredients:

The mix
3TB Canola Oil
1 1/4 Warm tap water.  Why is has to be warm is beyond me, but who am I to question temperature directions on the back of a packet of bread mix?

Method:

1. Combine ingredients, including the nifty packet of yeast that came in the mix, in a separate packet.   Easy enough.

2.  Knead 8-10 minutes. Ok, what is the definition of knead? Do I need a board? Some special equipment? A specific technique?  3 minutes in, and I'm already getting anxious. I decide to do it by hand. My hands get really messy.

Not actually an action shot. 

3. Place in a greased bowl. Cover & Let Rise in a warm place until doubled (approx 90 minutes). I have a few questions here that the back of the label has failed to answer.
             First, what is a greased bowl? Butter? Oil?  I go with butter.
             Second, what is a warm place?  It's winter.  It's cold in my apartment. Ok, it's Spring.  But it's still cold in my apartment.  Should I do something special to make it warmer in some area and then put the covered bowl there?
             Third, how will I be able to tell that it's doubled?  Height? Size in general?  What does it all mean? So many questions!  I just put it in a bowl on my countertop and go write about metarepresentational understanding in preschoolers for 90 minutes.

Ok, after the first 90 minute waiting period, it does not seem any bigger. At all. Maybe my kitchen isn't warm enough? I decide to make some sweet potato fries (what can I say, they're delicious and my little bugger can't get enough of them), and place the bowl in front of the warm toaster oven. (Which, by the way, is the best purchase I've made in years. Roast red peppers! Heat up the baby's food! Make fries!  Actually, the only thing it doesn't do that well is toast bread. Go figure).

Is this doubled? I can't tell. 

4. Punch down, cover and let rise until doubled, approximately 30-40 minutes. OK, not sure what punch down means when it hasn't really risen, but here we go. I get out some aggression and cover it back up.

45 minutes later, in front of the warm toaster oven?  Still not really risen. But hey, in for a penny, in for a pound?  At least it will be a funny kitchen disaster for the blog.

5. Form loaf and place in a greased 9x5x3 bread pan. Grease top of loaf. Cover with plastic wrap and let rise in a warm place until doubled (approximately 45 minutes). 

Now it's in the loaf pan and I'm hoping I won't end up with a hard mass of multigrain mush.

What does it mean to grease the top of the loaf?  I just put more butter on it. Can't go wrong with more butter.

I write about how realistic acting shares characteristics with lying but in the end is a separate cognitive process for 45 minutes.

Ok, the loaf has risen!  Hallelujiah!  But, unfortunately I forgot to preheat my oven. (SHOOT). I didn't realize the next step was to put it in the oven. This is what I get for 1) not reading ahead in my recipe. 2) trying to blog, write a paper, make sweet potato rounds and bake at the same time. Bad Thalia.

Notice both the sweet potatoes and the chunks of butter on top of the bread. 

6. Bake at 375 for 30-40 minutes. 

Moving on... into the oven!

7. Thump top of loaf. A hollow sound indicates a properly baked loaf. 

That's hilarious, but my loaf thumps nicely. Yay!

Holy cow, it worked!

8. Turn out of pan, cover with a towel and cool before slicing. 

Done and done. And, happily, as my recently deceased 99 year old Grandmother would say, it was "Delicious!"  We went out and bought special jam just to eat with it.

Happy bread baking, all!


Delicious!


Friday, September 14, 2012

Thalia Learns to Cook: Sweet Potato Fries!!

Recipes and examples of dishes I can now make!  Taken from a variety of sources and changed according to my abilities, needs, and dislike of doing dishes.


I have discovered the secret!  After years of trial and error, late night attempts and multiple multiple multiple recipe searches online, I have figured it out.

What? You may ask?

A deeply important, all encompassing, really critical piece of information.

How to avoid totally soggy sweet potato fries.

What? You were expecting the Higgs Boson?

Ok, so I love sweet potatoes. They are delicious. And, better for you than white potatoes, not to mention more flavorful.  Although they are tasty heated up in the microwave, I love making sweet potato fries. And as a bonus, a sweet potato fry is an excellent food to feed a baby. Which I have.

The problem is, most of the time I end up with soggy fries.  I wash the sweet potatoes, toss them with some olive oil and spices, and then put them on a baking sheet in the oven or toaster oven. And they come out soggy. Delicious, but without a nice crisp skin.

Happily, I came across the solution by accident the other night.

As mentioned, I have a baby.  He's 6 months old and therefore starting to eat solid foods.  One tip I've  been given is to use a crinkle cutter to cut up his food.

Crinkle cutter!!
It creates lovely little ridges, making it much easier for his small fingers to pick up something slippery. It works great, so when making him some sweet potato the other night, I crinkle cut up the potato, spiced it, and tossed it in the toaster over.

Surprise! Totally delicious sweet potato fries with a nice crisp skin! I almost didn't give any to the baby.

Recipe: Sweet potato fries with a crisp skin!

Ingredients:

Sweet potatoes
Olive Oil
Spices

Tools:

Crinkle cutter
Knife
Oil brush
Ramekin
Baking sheet

Method:

1) Cut the sweet potato long ways in half.
2) Use crinkle cutter to cut each half into 1/3rds, or whatever thickness your sweet potato loving heart desires.
3) Mix together olive oil and spices. I sometimes use rosemary and garlic. Curry also works really well. Or oregano and thyme. In the end, you get very subtle flavors, so go crazy!
4) Places fries on baking sheet. Make sure they're not touching each other.
5) Brush the fries with the oil and spice mix. Make sure to get all sides.

Brush with oil and spices
6) Put in the toaster oven, 400 degrees, 5 minutes and then flip the fries and 5 minutes more.
I love a good toaster oven.


Eat, making sure you get some on your bib, hair, ears, lap, high chair, floor and under your knee. (I have no idea how it got there).


yup.


Enjoy!

Thursday, August 23, 2012

The Two Best Cream Cheese Frostings EVER: Dulce de Leche and Whipped Cream

Today was not my best day -- my laptop died (RIP Antonio!) just as I was about to make a brilliant scientific discovery (that's what we're calling null effects these days) and shortly thereafter I nearly followed its example on a short 3 mile run (damnit legs! I thought we had a truce!). So, instead of actually addressing any of these issues (anyone wanna buy me a new laptop? Or some bionic legs?) I baked.

I had a vision, but not much more to go on than that -- chocolate cake with dulce de leche frosting.

This post isn't about the cake (my new staple), but about the magical frostings that just kind of inexplicably happened-- dulce de leche cream cheese frosting (important fact: my ipad changes "dulce" to "bruce", so this frosting will from now on be called "bruce") and, perhaps even better, whipped cream cream cheese frosting. Two creams in one. YES.

Unfortunately, but totally consistent with the theme of the day, while the dulce de leche frosting was delicious and provided a nice crumb coat, there wasn't enough of it, nor was it quite stable enough for decorating. So I reached into the vault of frosting recipes I have on hand (hello, google) and found a whipped cream cream cheese frosting.

This is my new favorite thing. I don't know if I can adequately describe my love of this frosting in my current fragile state, so let me just say -- it's amazingly delicious, not too sweet, light and fluffy, and be still my buttercream detesting heart, decorates as well if not better than the comparatively tasteless butter monstrosity (speaking of, I have 5 pounds of butter in my fridge. Ideas? Suggestions? Requests?).

Things seemed to finally be going my way -- my day took a definite turn for the better when I tasted these delicious frostings! I frosted and decorated my cake, reveled in the beauty of it, tasted the delicious frostings, reached for the lid to my cake carrier, and... well... gravity is such an asshole. Note to self: Do not keep cake carrier on top of the kitchen cabinet.


I have high hopes for tomorrow.

Sorry about the lack of pictures -- I didn't realize these recipes would be post-worthy until it was too late. Instead here is a picture of penguin duct tape. I'm calling it Bruce. 

Dulce de leche frosting (or, Bruce): 

Ingredients: 
2 cans sweetened condensed milk
2 8-oz blocks of cream cheese

First, make the dulce de leche--don't be scared! It's incredibly easy and everyone will be wildly impressed. Pour the milk into the top of a double broiler and cook it for an hour or hour and a half, stirring occasionally and adding water to the bottom of the double boiler as needed until the milk turns a light caramel color and thickens up. Let it cool.

Whip the cream cheese until light and fluffy. Add in the dulce de leche and whip!

Note: It might be a better consistency for decorating if I had used either 3 blocks of cream cheese or didn't use all the dulce de leche. I didn't try either, but if you do, let me know how it goes!

Whipped Cream Cream Cheese Frosting: 

Ingredients: 
1- 8oz block of cream cheese
1/2 c sugar
1 t vanilla
pinch of salt
2 c heavy cream

Whip the cream cheese, sugar, vanilla and salt until light and fluffy.

Add the cream and slowly mix to incorporate. Once it's combined, ramp up the speed and whip like mad until the frosting is nice and thick, about 2-3 minutes.

Sunday, August 19, 2012

Strawberry Charlotte Russe: An Oldie but a Goodie.

I'm so super lame. I haven't posted any recipes for a long time... and I've even been baking tons! Just as much as ever! I've had a recent love affair with blondies (see? I took pictures, I totally intended to write it up).
Chocolate Peanut Butter Blondies
I made another cheesecake in puerto rico (this time key lime, again without any supplies as you can see by the 9X13 dish we had to use, and under duress with a NOVA crew filming our efforts): 


And I even branched out into candy and made chocolate toffee salted caramels.

I don't have Thalia's excuse (no babies here!) but I have been traveling a lot this summer, and I had a big goofy handful of a foster dog that a few students and I rescued from Puerto Rico. Oh yeah, and I'm hitting the academic job market, but the less we can say about that the better (otherwise I might curl into a ball in the corner and never finish this post). 

Goofy foster dog, Toad.

Anyway, all of that preamble is to say, sorry. I'm super lame. BUT I have something super fabulous for your culinary enjoyment to make up for my super lameness-- Charlotte Russe! I was only introduced to Charlotte Russe a couple years ago when I was visiting my parents and we were getting ready for a dinner party. In brainstorming about dessert my mom suggested a Charlotte Russe, mentioning it as a childhood favorite and staple of her youth. 

For those of you, like the past me, who haven't heard of Charlotte Russe, it's basically custard encased in ladyfingers. That description doesn't really do it justice -- it's silky and sweet and understated. It's delicious. Also, it's gorgeous. Look at how pretty!! In other words, the perfect dessert for my comeback debut! 


Ingredients: 

For the ladyfingers: 
3/4 c. Kirsch 
3/4 c simple syrup (1 part water to 2 parts sugar, boil until sugar is dissolved, voila!) 
36-40 ladyfingers (the hard italian kind) 
parchment paper*
springform pan*
*If you don't have these, why not do it as a trifle! Instead of arranging the ladyfingers as described, alternate layers of ladyfingers and custard in a trifle dish)
Italian Style Ladyfingers
For the custard: 
3 c whole milk
1 1/4 c sugar 
4 t vanilla
1/2 t salt
1/4 c + 2 t blue curaçao or grand marnier 
1 packet unflavored gelatin 
1 packet strawberry gelatin (or you can use 2 unflavored or 2 strawberry, just decrease the sugar by a couple tablespoons if you use both strawberry)
10 egg yolks, well mixed
1 lb fresh or frozen strawberries, hulled
2 c heavy cream

For the Strawberry glaze: 
1.5 lb strawberries, hulled 
1/3 c sugar
1/2 c water + 2 T water 
juice from one lemon
1 T cornstarch
1/2 packet of strawberry jello (optional) 

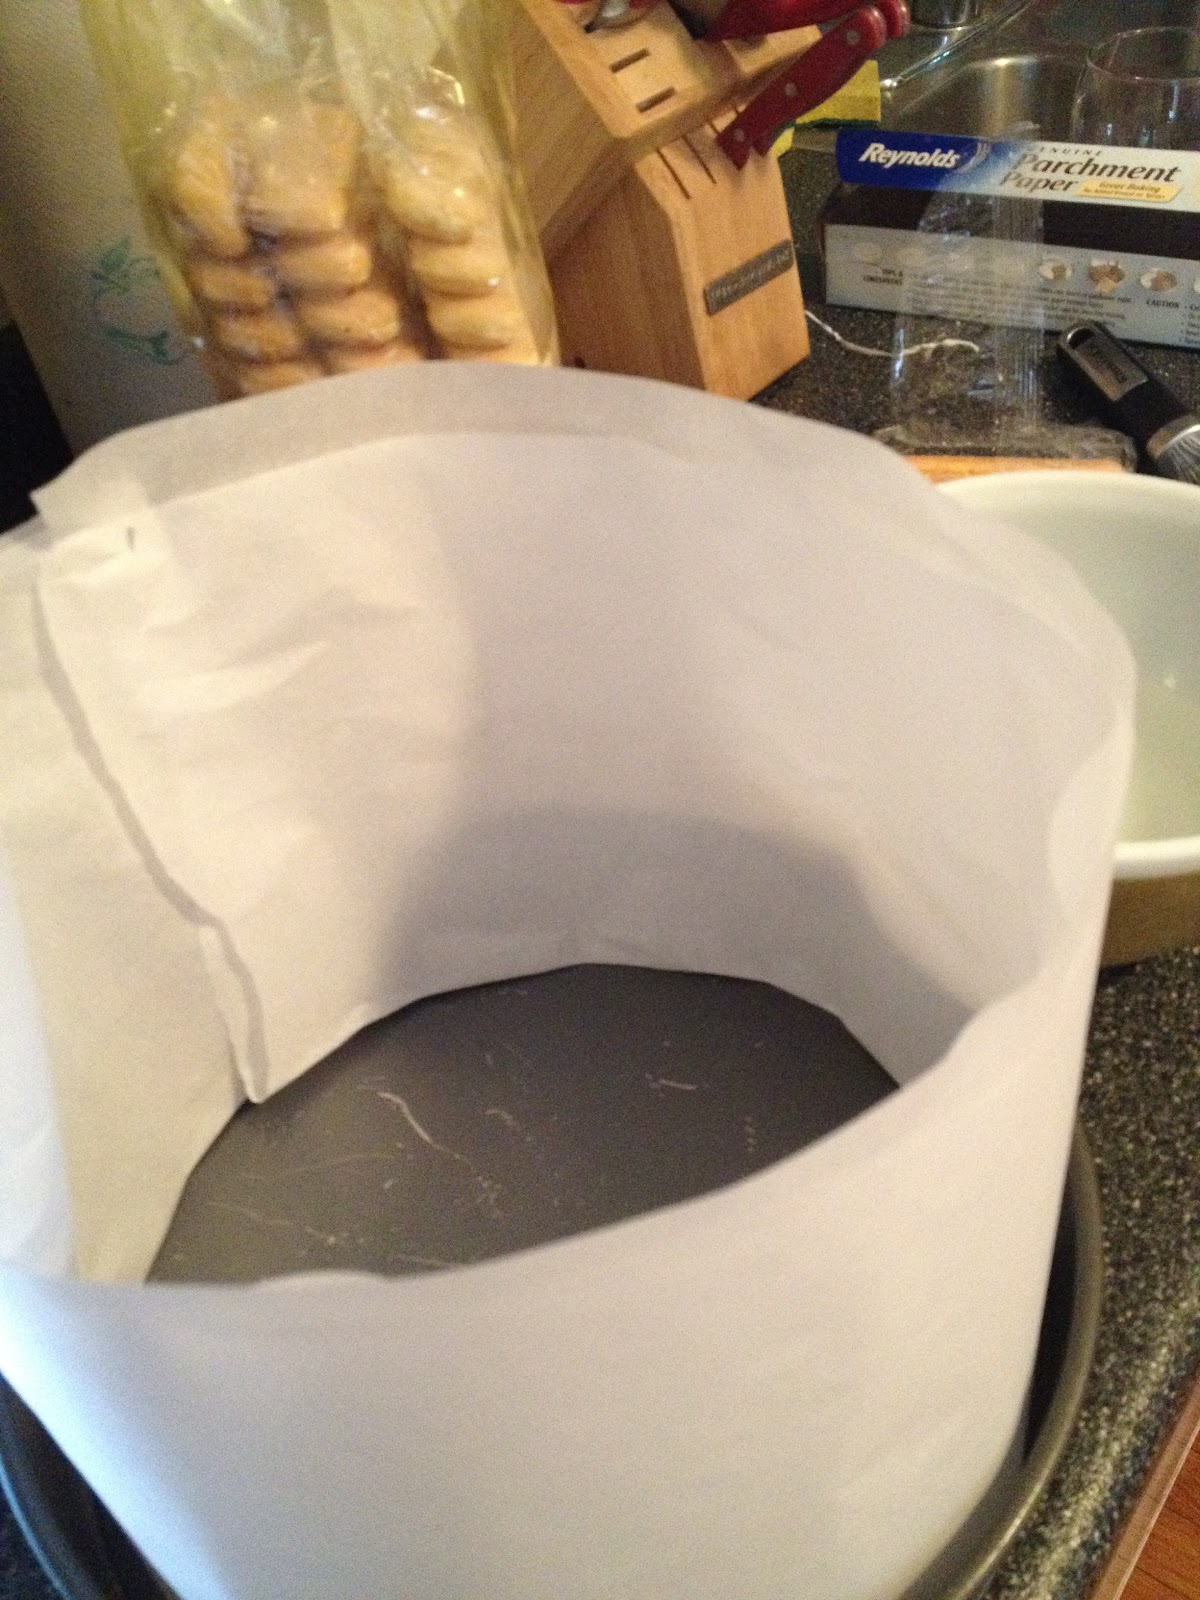
Mix together the kirsch and simple syrup in a shallow bowl. Cut a piece of 30" parchment paper, fold it in half, and make a collar around the springform pan. Use a paperclip or a safety pin or something to fasten it together. 

Dip the ladyfingers in the kirsch/simple syrup mixture and hold for a couple seconds so they soak up the goodness. 

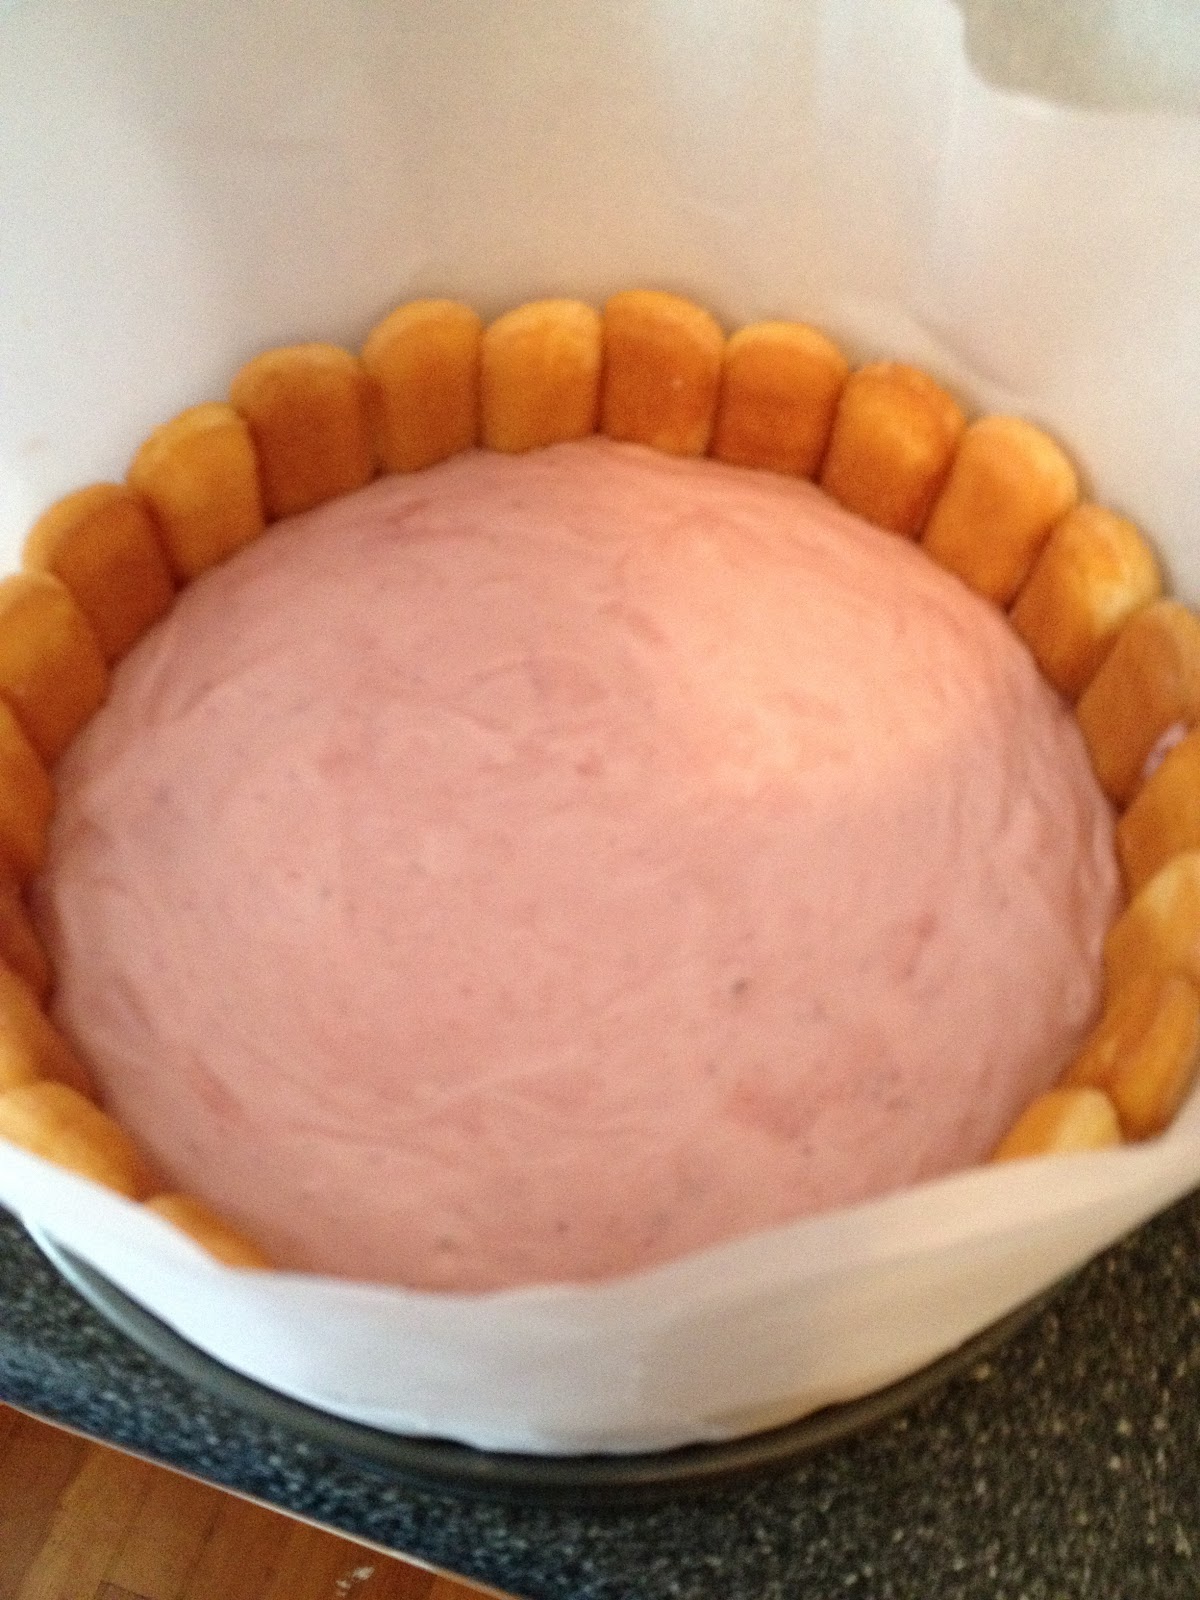
Place the ladyfingers (sugar side down) along the bottom of the pan, leaving enough space for perpendicular lady fingers to be placed around the rim (sugar side out). 

And keep going until the bottom is covered and there are ladyfingers all around the circumference. If you've adequately soaked the ladyfingers they'll expand and there should be no gaps. If there are gaps in the bottom fill them in with broken ladyfinger pieces. 

Now make the custard! Pour the curaçao into a bowl and sprinkle with the galatin powder. Set this mixture aside while you cook the custard. 

Bring the milk, sugar, vanilla, and sugar to a simmer and cook, stirring occasionally, until the sugar is dissolved (5-8 minutes). 

Once this happens, turn off the heat and add about 1 cup of the hot milk mixture to your reserved eggs, stirring to mix well (this is called tempering eggs). 

Add the tempered eggs back to the custard mixture and stir well. 

Cook over low heat, stirring constantly, until the custard thickens a little. You'll know it's done when you turn your spoon over and run your finger through the custard on the back and the custard doesn't fill back in the mark you've made. 

Pour the custard through a strainer into a large bowl then add in the gelatin mixture, whisking until dissolved. 

Stick the custard in the refrigerator for about 15-20 minutes, stirring occasionally, until it reaches about room temperature. 

Meanwhile, puree the strawberries. 

When the custard is cooled, add the strawberry puree to it, mixing well. 

Whip the cream, and fold it into the custard. 


Pour your custard into your ladyfinger springform pan, and refrigerate for at least 4 hours. I took this opportunity to go to the beach, and highly recommend it. 

Next make the strawberry glaze! Bring the strawberries, water, and lemon on the stove on medium-high  up to boil then reduce the heat to low and simmer until the strawberries break down (about 10 minutes). You may need to encourage them to do so by smashing them with a potato masher. It's also loads of fun. 

Strain the solids from the sauce, pressing as much juice as you can out of them before discarding. 

Whisk the cornstarch with 3T water, add to your strawberry concoction (and add the optional jello powder now too), and simmer 3-5 minutes until it thickens into a glaze. 

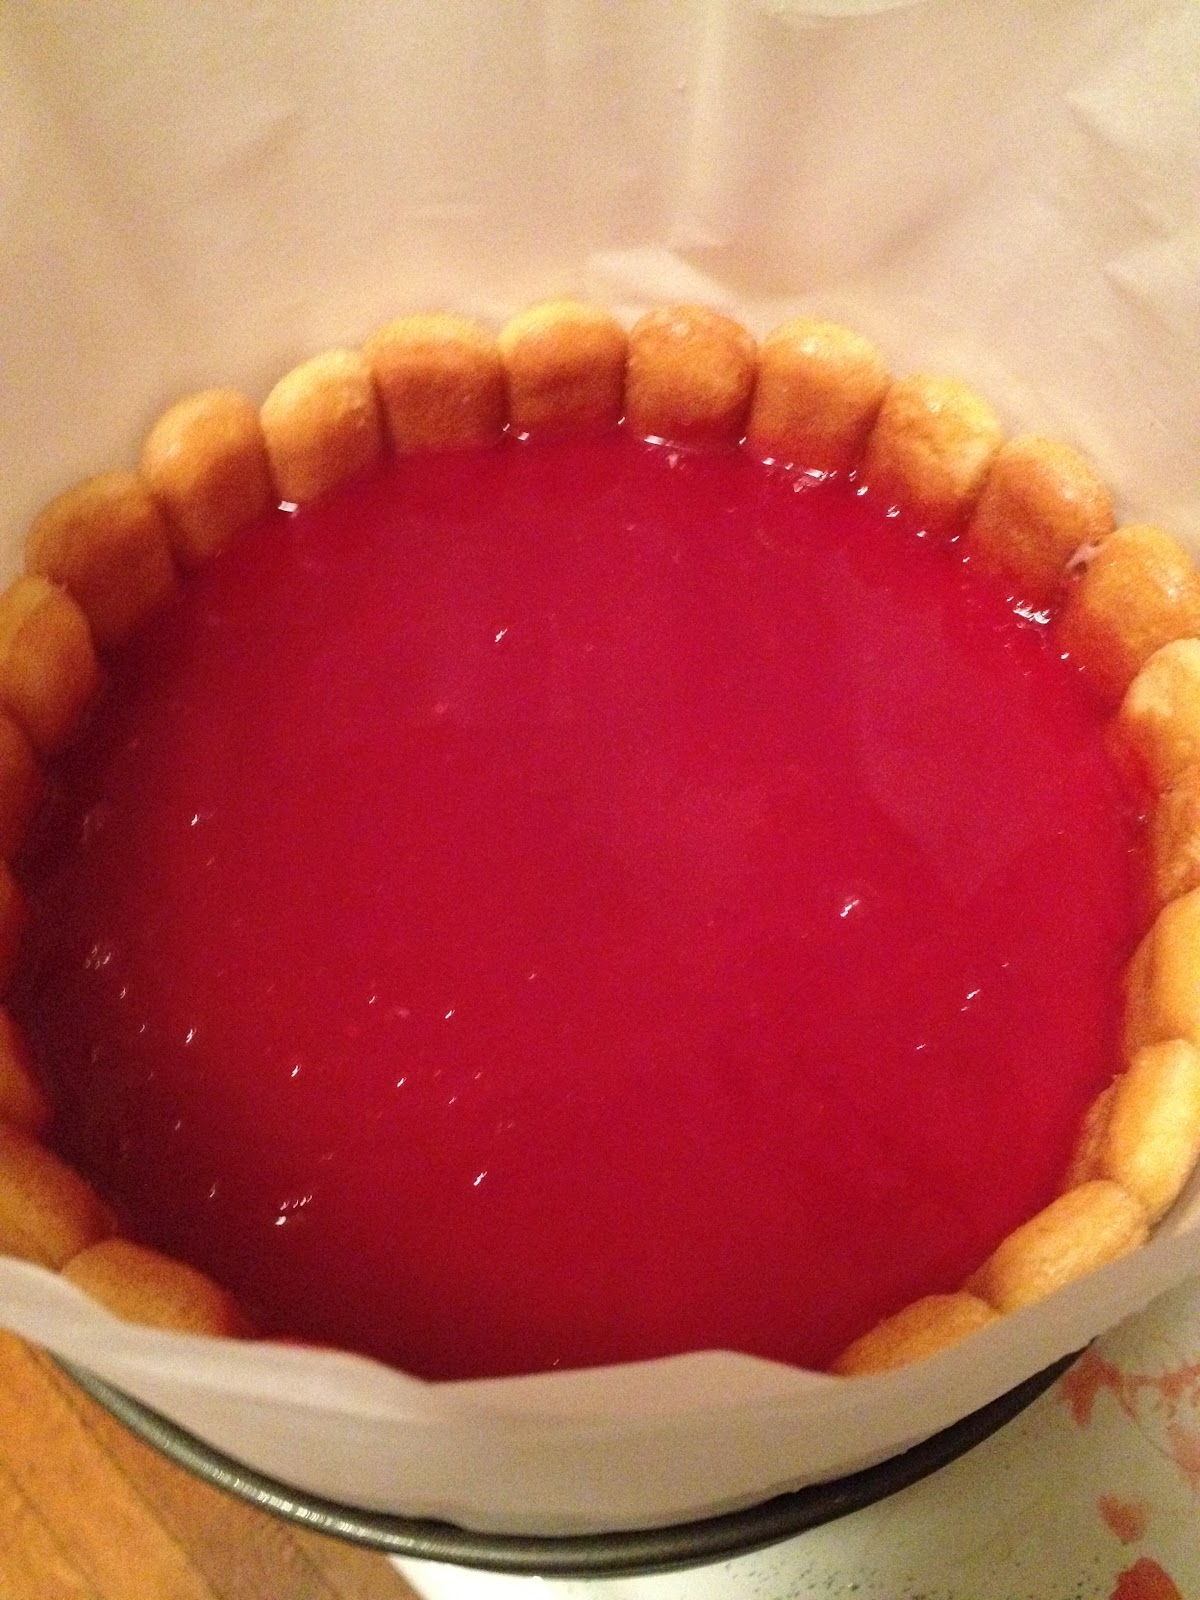
Cool for 15-20 minutes then pour on top of the custard, being careful to cover the whole surface with the glaze. 

Cool overnight. 

When it's time to serve, unlock the springform pan and remove the rim and the parchment paper. 

Cut it in pieces like a pie and serve immediately, otherwise it'll get a bit unstable. If you want to display it before eating, just tie a ribbon around it so it'll stay standing! 

Enjoy! 
Sunday, August 5, 2012

Thalia Learns to Cook: Sauces!

Recipes and examples of dishes I can now make!  Taken from a variety of sources and changed according to my abilities, needs, and dislike of doing dishes.

To my mind, a major component that separates the meal made at home from the fancy schmancy made in a restaurant is the presence of a sauce.  Sauces are delicious. They add flavor, moisture and depth to otherwise plain ole’ pieces of chicken, fish, etc.  However, they are difficult to make and make well. Although I haven’t been doing much new cooking as of late (see: 5 month old who is cute and smiley and doesn’t think sleeping is something he should be doing), I have been starting to venture into the world of sauces. And also panko bread crumbs (which are amazing and the subject of another post).

Tonight, we decided to make a lemon caper chicken.  Or rather, chicken breasts with lemon-caper sauce. What is a caper? I have no idea. But it’s small and salty and goes well with lemon.  Plus, we had some delicious rose wine that had to be drunk. 
Delicious Rose wine.

Gone are the days where opening a bottle of wine means finishing it in the same night. Nope, we have become 1-glass with dinner people. Mostly because any more than that and I will fall face first, dead asleep, into my lemon-caper chicken. So, there was extra wine. On with the recipe!

 Ingredients (Recipe taken from http://allrecipes.com/recipe/chicken-with-lemon-caper-sauce/)
  • 1 pinch salt (I omitted this- the capers have so much salt in the sauce, no salt needed for the chicken).
  • 1/2 cup all-purpose flour (You actually need way less than this, just enough to coat the chicken).
  • 2 (6 ounce) skinless, boneless chicken breast halves (I cut these down to even out the cooking)
  •  2 tablespoons olive oil (I also added some onion into the pan with the oil, only because I had left over cut up onion from some guacamole I had made earlier. Hate to let some cut up onion go to waste. It’s like you cried for nothing).
  • 1/4 cup dry white wine (I used dry Rose. It was delicious).
  •  1/4 cup lemon juice (I used a mix of fresh lemon and jarred lemon juice. It ended up being a bit too lemony- so next time I will use less).
  • 1/4 cup cold unsalted butter, cut into pieces (I used pastured butter. Um, pastured butter is the best thing in the whole world. Find some, buy it, eat it, and be happy).
  • 2 tablespoons capers, drained (I didn't drain them- it made the sauce a bit salty, but it was a good thing).
  • 2 lemon wedges (As mentioned, the sauce ended up pretty lemon-y, so extra lemon was unnecessary. Your experience may vary). 


Directions
1.     Mix together salt and flour in a small dish or plastic bag, then coat chicken and shake off excess. Heat olive oil in a skillet over medium-high heat. Shake excess flour from chicken, then brown in hot oil until both sides are golden-brown, and the inside has turned white and firm, 3 to 4 minutes per side.

Chicken dredged in flour. The word dredged is funny. 
Traditionally, I have a problem just letting the darn chicken cook. Leave it alone! Let it cook!  So now I set a timer, 3 minutes and turn. 3 minutes and flip. 3 minutes and turn. 3 minutes and flip.  Then it's done.  I get impatient.  So, instead of futzing with the chicken as it cooked (Leave it alone!) I took a picture of the timer on my microwave. That's how I roll.
39 seconds to flip!


2.     Remove the chicken, and set aside. Pour white wine into the skillet, and allow to boil as you dissolve the cooked bits from the bottom of the pan. Add the lemon juice, and allow to come to a boil, cook for a few minutes until reduced by half.

The wine almost bubbled away! Nooooo!

My stovetop is hot, so this took no time at all.  Beware, you might want to remove the pan from the heat to avoid losing all of your wine and/or lemon juice. 

3.     Sprinkle the cubed butter into the boiling sauce. Swirl and shake the pan vigorously to dissolve the butter, thus thickening the sauce. The butter must never come to rest, or the sauce will separate and become oily. Once the butter has completely incorporated, remove from heat and stir in capers.

I was stirring so fast, you can't even see my hand! I'm speedy. 

So, this instruction had me totally freaked out, and is the reason sauces are something I've tried to avoid.  It seems so easy to just mess it all up if you're not moving quick enough.  But, if you prep ahead of time (an important lesson!!), then it goes relatively smoothly.  Happily, my sauce did not break. Or if it did, I didn't notice.  Whatever, this much butter? It was delicious. 


4.     To serve, pour lemon-caper sauce over the chicken, and serve with a wedge of lemon.

Delicious!

I served with a salad: greens, tomato, red pepper goat cheese. The sauce was also a nice salad dressing. 

So was it delicious? 


Yes it was!